Wednesday, 14 May 2014

Lynne for all Seasons!

Hello Followers and Friends and Welcome to Magpieheaven. I've been feeling a bit under the weather this week with a virus I just can't shift. Nevertheless, I've been crafting away and it's taken my mind off feeling poorly! Focusing on 'Nature's Glories' on this canvas, which I've created to brighten up my Mum's flat, has lifted my spirits so I should like to enter it for the Country View Crafts, 'Nature's Glories' Challenge here.
 My plan is to see if I can eventually create my Mum four canvasses corresponding to the Four Seasons. This canvas is not exactly Keren Baker's CAS style, which is amazing and has to be checked out; but the lady at the window was inspired by Keren's wonderful 'cut out' technique featured over on the PaperArtsy blog here. This is where I began.
I took a very inexpensive, discount art shop canvas and added as many different textures as I could before covering it in a good coating of Gesso. Here you can see I used die-cuts; Grunge Paste through stencils; masking tape; a Prima topiary tree and some punched out leaves to create my background.
In this close-up you can see the effect of Gesso over masking tape - a tip from Gabi at Dusty Attic. Her incredible video is well worth viewing!  At the very top of the image, you can also see the effect of squeezing Grunge Paste through gauze.
I built up my canvas, adding a range of embellishments: Tattered Pine Cone Roses; Tattered Florals; Prima flowers and resin birds and a beautiful cherub given me by my good friend, Lucy. Everything was given a coat of Gesso!
I made sure the sides of the canvas had texture added too.
While everything was drying I painted my window die-cut with some PaperArtsy Little Black Dress. I didn't stick it down, but every so often I would place it onto the canvas to remind me of what I wanted the composition to look like eventually.
This is a huge jump, I know, but I think that photographing every step would have taken ages, so I apologize for a leap - or should I say 'a spring' - forward in time? I wanted to evoke the light of one of those evenings in late spring when it doesn't get dark until well after eight and summer is almost here. I mixed little mister bottles of PaperArtsy washes in Guacamole, Brown Shed, Hey Pesto and Inky Pool and thoroughly enjoyed myself spraying to my heart's content. I think that the spray painting technique gave a soft, twilight feel to the canvas. I then accented areas in paints and Treasure Golds in Sapphire, Green Amber and a limited edition purple.
I am indebted to the brilliant Keren Baker for my Edwardian lady gazing out at Nature's Glories in her garden of endless Springtime. I stamped her onto card first washed with PaperArtsy Vanilla. I used Versamark, Onyx Black and once this was heat set, I dabbed on Blush and Brown Shed with a baby-wipe to create her skin tones. Then it was time to take the scalpel and cut away her gilded cage! The top of the cage becomes a pretty lamp, only just lit for the evening and she gazes out of the window into a world of endless possibilities! The wall-paper is PaperArtsy Chatsworth and she has a curtain of a little tea-stained lace. The embellishments on the window include a painted resin flower arrangement; tiny punched out butterflies, a jump ring and some tiny rusted keys - I love this charm given me by Lucy: maybe they are the keys to the lady's studio where she has been creating with the sun streaming in.
The butterflies are painted and stencilled card or punched out of Chatsworth paper and the Tim Holtz trellis was embossed with Verdi Gris and Copper Frantage.
I continued my trellis over the edge of my canvas. I should like to have included a sentiment from one of Lin Brown's Eclectica ones, but those roses just went wild and left no room for anything else! Sorry, Keren, if this isn't quite in the spirit of CAS; but I did enjoy cutting that lady out of her cage and you were the inspiration! I should like to link my canvas to PaperArtsy and Country View Crafts Challenge for May. Thank you so much for stopping by to peep into the Magpie's Nest today. My next canvas is going to be Summer. I do hope you have a wonderful, creative week and that all your crafty projects flourish.

Friday, 9 May 2014

Lucy's Tissue.

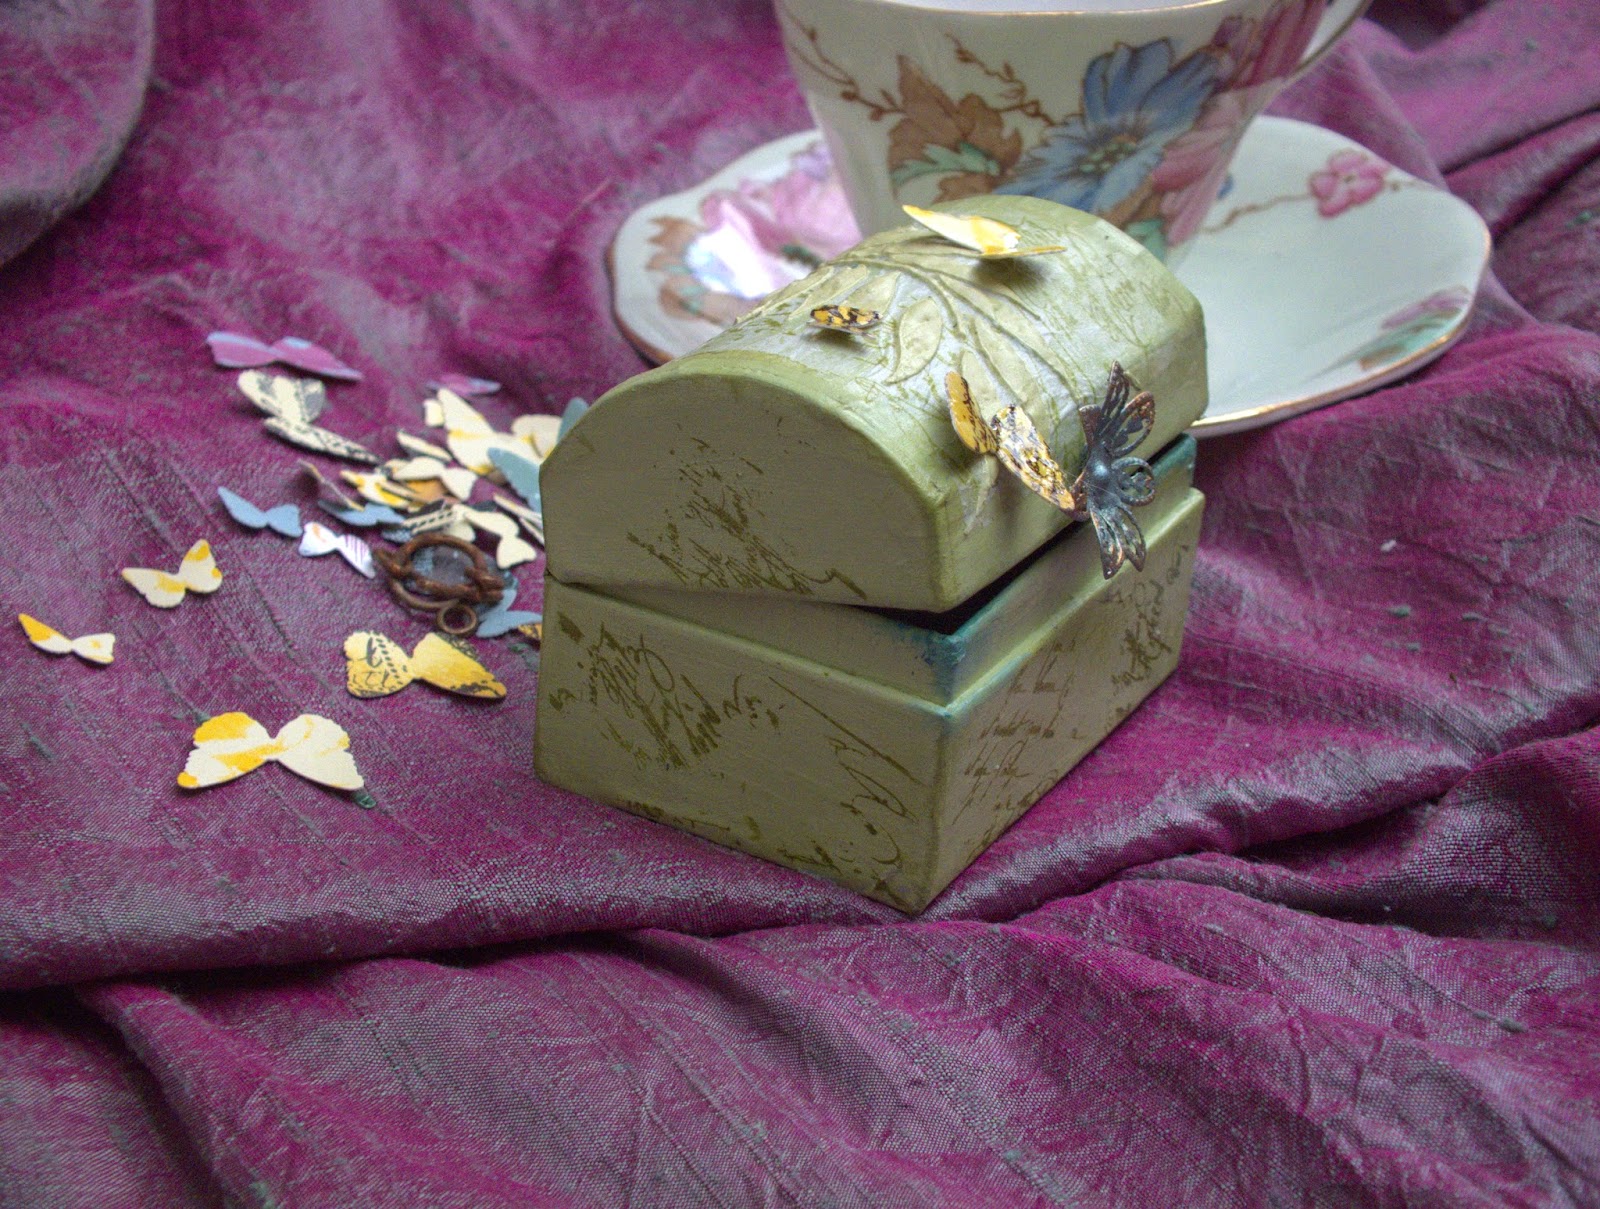
Hello and welcome to Magpieheaven Followers and Friends. Today I've been having so much fun in between tutoring my students that I had to share it with you! Over on the PaperArtsy blog this week there have been some incredibly inspirational GDs! First there was the wonderful, Liesbeth with her sewing tin. I was tempted to join in with this, as it involved burning. I would love to have created a tin in which I could see pictures of bearded old men and collie dogs with revolvers - or was it meerkats(?) - like Helen's. Alas we don't have a coal fire except at Christmas! Then there was Sara Nauman with her beautiful tissue covered journal! Oh dear, I'm already behind with the journals I'm supposed to be working on! In the end it was Lucy who lured me away from the housework and tutorial preparation, I just had to try her suggestion for stenciling with Grunge Paste onto tissue. I loved her beautiful little house with its Clarice Cliff colours and bright as a button roof, but I had nothing like it. Never mind, there was a tiny papier mache chest I had been meaning to alter for ages. I was put off because it is so tiny I couldn't imagine how I might add texture and dimension to it. I wondered if the technique Lucy had made work for her house might be adaptable to a curved lid.

     I began by painting my tiny chest on the inside with Little Black Dress Fresco to contrast with the outside of my box. I also painted some card with different Fresco paints and stencils, stamping some with the Ink and the Dog Mini 30 before using the Martha Stewart Butterfly Punch to turn them into spring butterflies. I then covered them with Versamark and dipped them into clear UTEE, heating them from below with a heat tool. I took great care holding the tiny butterflies with craft tweezers!
It's difficult to photograph, but the effect was to create what looked like tiny porcelain butterflies. After they were finished, I applied first two coats of Sage and then two coats of Guacamole to the tiny box, just touching the edges with Hey Pesto. The next step was to try Lucy's tissue technique! For this I used ordinary tissue wrap in white, stamping it first with Ink and the Dog Mini 84 in Wendy Vecchi Fern Green Archival ink. I won't explain exactly how Lucy's technique works. Just click here to find out. I used Satin Glaze to adhere my tissue to the lid and smoothed it down carefully over the curve. I used some Grunge Paste coloured with Hey Pesto and this is the effect!
I was so pleased because the tissue really does disappear! This is such a tiny box, I kept it simple using the Lin Brown leafy Eclectica stencil.
Here's another view of the lid! It really is so simple to do and it works a treat!


Just to show the scale, I have photographed the box next to my Grandma's afternoon tea cup! The finishing touch is a little metal flower, painted with Bora Bora Fresco with a pearl at the centre, given the Treasure Gold treatment with Sapphire, Green Amber and Florentine.
 I stamped the Ink and Dog Mini 84 straight on to the sides of the box. I would love to have included a sentiment like the beautiful William Blake one chosen by Lucy; but the box was so small I felt it was best to keep things simple.
And inside you will find a tiny blue bird's egg that I came across lying on the path on one of my country walks with Mr Magpie. I do hope that the bird to which it was once home is now flying as free as those butterflies on the lid! Thank you so much for stopping by to look today and Thank You, Lucy for a brilliant new way to use tissue! I shall definitely be re-visiting this one!


Thursday, 8 May 2014

...And now for something completely different!

Hello my dear Followers and Friends! Do any of you remember the '70s? You're probably all far too young! But if - like me - you do, you'll remember 'The Monty Python Show' where one anarchic sketch would lead into another with the words, '...And now for something completely different'. Recently I was inspired by Trish from Trish Too to try something 'completely different' for a background. I started off by making ATCs and Moos and then I created a couple of cards for friends, which I posted here the day before yesterday. Here is a little more detail on how I created these backgrounds.
 I stuck strips of background paper and text from my piles of scraps which you can see under the big orange-handled scissors over the back. I also painted and sanded some card left over from another project. This was for me to stamp text onto. I knew I wanted an aged look so I painted with Vanilla, Caramel and Tikka Frescos, using my Prima tool to sand, and a baby wipe to blend.
This is the master board I created to cut my little cards from. Trish used crayons to cover her background so more of the text and paper strips showed through. I really want to make some more ATCs, but when I do, I might try a thinner application of paint so that more of the under layer does show through. You can see here I also dipped a fabric conditioner lid into little pools of paint to make circles and I did some stamping from a PaperArtsy script stamp on the Hot Picks plate 1006. My colours were Frescos by PaperArtsy in Antarctic, Mermaid, Inky Pool and Hey Pesto. I scrubbed away with a Baby Wipe to reveal different layers; but I didn't want to rip my papers underneath.
Here is a selection of some of the ATCs I created when I had cut my background into individual cards. I think they have a bit of a Monty Python look about them, as they are rather surreal! I used some Retro Cafe Art Gallery paper cuts left over from projects I had done in the past. It was great fun putting together heads, eggs, butterflies and birds and creating fantasy characters to inhabit the fantasy land I had created with my painty, scrappy background!
Is this lady the goddess of Story-telling, appearing out of the twilight grasses of Hot Picks 009 with a tiny pearl necklace? To create my text I cut up the words from sentiments to add a mysterious message to each card! I highlighted the edges with a white Posca pen.
In this one, Frida Kahlo has morphed into one of the parrots she loved to paint so that she can inspire us to bring colour into our lives. I wonder what inspiration is about to hatch out of that egg?
Making these ATCs was a real flashback to  the imaginative games I used to play as a little girl, creating new characters by cutting and pasting images and telling stories about them.
I used some Frantage on this Art fairy's wings!
I don't think this Edwardian 'super-hero' is a serious threat to Spider-man - I mean, Butterfly-man doesn't quite 'cut it', does it?
And here is some of the extraordinary flora and fauna of Horizon Land!
I had the most fun with working on the tiny moos!

I used lots of Satin Glaze to seal my ATCs and give them a nice shine.
The moos can be used as bookmarks! I highlighted the butterflies with a gold pen.
You might just be able to see a little of the background peeking through the paint on this one. I had so much fun playing with these I completely lost myself in the activity! I hope those people I have sent them to will like them and not think me too strange! Thank you so much for taking a look.  Have a wonderful Friday and a creative weekend! 

Wednesday, 7 May 2014

Dreaming with the Dragons - Gold and the letter Q

Hello and Welcome to Magpieheaven. I know we Dragons always say this, but I can't believe it's time for the Dragons Dream TIO again! And it's my turn to choose the recipe too, which I'm really excited about! I do hope you will be able to pop over to the Dragons Dream and see what my 'teamies' have created and that you will feel able to join in too. Remember all you need on your tag is to include the letter 'Q' some gorgeous gold of some kind and at least one stamped image. I chose a jumbo tag - I need some more of these now - and I came up with this Renaissance themed fantasy. I expect you've guessed that my 'Q' stands for Quill and that my focal stamped image appears to be on a unravelling scroll!
I wanted to have lots of fun with texture on this one and try to create something sumptuous, so here are some steps along the way.
I painted my jumbo tag with Honeydew, a Fresco Opaque.
After spreading a thin layer of Grunge Paste over my tag, I pressed down some gauze from my stash into it.
When this was nice and dry, I went over it with some Brown Shed Fresco, which is a translucent.

 This is when I really got too involved to take any more photos! I stenciled through a Prima flourish stencil with Wendy Vecchi gold embossing paste and I applied lots of Frantage and Gold UTEE! I made the quill from a Lynne Perrella stamp of a nib, which I tipped in gold UTEE  and the feather is book text, gessoed, spattered with gold UTEE and sculpted onto wire. The hand gripping it is a PaperArtsy mini.
Here you can see the stenciling and a rose created from two different PaperArtsy flower dies. I stamped the Lynne Perrella lady on to card painted first with Stone Fresco, heat set her, and painted the detail with washes of Fresco. There is a bit of a shine on the photo, as I applied a couple of coats of clear UTEE to the image. The little resin bird has been painted and then Treasure Gold in Rose Quartz was applied. I also used Rose Quartz on the under-side of the rose petals.
For my letter, I used the 'triple embossing' technique. I applied Versamark to the tag and then layers of UTEE and Copper Frantage. I heated from under the tag with my heat tool, after each layer was applied until there was a moulten puddle! Then I covered my 'Q' with Archival Ink and pressed it into the melted UTEE. On the top left are some bronzed fragments, which I pressed into Claudine Helmuth's Multi-Medium. My tag reminds me of the Wedding Chests given to newly weds as gifts in Renaissance Italy as they began their new life together. Some of the beautiful paintings in the National Gallery are actually panels from these richly decorated chests, which often showed mythological or allegorical scenes featuring Venus and Cupid - of course! Perhaps my lady, seated at her arched window has sent out this little golden bird with a message of love and loyalty to her fiance? Have a lovely, creative Wednesday and don't forget to try and join in with the Dragons Dream TIO this fortnight.

Tuesday, 6 May 2014

Birthday Cards

Hello and welcome to Magpieheaven, where I've been making birthday cards for a couple of friends. I won't give their names just in case they see this blog and the surprise is spoiled! I often read on other blogs that crafters begin by making cards before they spread their wings and take flight into a world of canvases, altering and home decor pieces. That's definitely my history too! Before discovering the thrill of making exploding boxes back in April 2013, I made cards from time to time. I never thought too much about how I put them together or what techniques I might use on them. Now I find that confronted with a sheet of white A4 card I often feel uninspired or downright bewildered as to how I'm going to create something special - especially if it's going to have to fit into an envelope. With these cards I had a plan! I decided to play some more with the idea of creating a Master-board. Trisha's idea for Mail Art (see here) could perhaps be adapted to a slightly larger project than ATCs and Moos! This is what I came up with! I really hope they work and that the recipients will like them!
I had to work super-fast to get them done; as I'm late for both these birthdays - eek! There was no time to take step by step pictures. I have taken some detail shots to show you the effects in places, though.
Once again, I couldn't resist getting painty and only the tiniest areas of my original paper strips showed through! One of these days I'll have less coverage - well, I'll try to! This time I turned the Master-board so that instead of horizontal strips, I had vertical ones and I liked the 'Shabby Chic' look this gave - reminiscent of wooden panels. I had to use my new Tim Holtz trellis die! With those 'wood panels', I think this card looks a little bit like a flower growing through a trellis on a garden shed. My magpie brain is now planning all sorts of uses for these strips - maybe a canvas with paper strips and Grunge Paste to create the garden shed texture even more?
I used my trusty plastic lid to encircle areas of stencilling. The Peterloo flower was painted with Frescos in Lake Wanaka, Mermaid and Inky Pool and accented with a little Sapphire Treasure Gold. The sentiment is from Lin Brown's Eclectica flower sentiments for PaperArtsy.
I had enough Master-board left to create a second card. I wanted to see if I could create a completely different effect with this one. I think we go indoors with this one and step inside the little cottage, leaving the shed and the garden to enjoy a nice cool glass of lemonade.  As you can see I used lots of bits and bobs of lace from my stash. The bottles are from a Hot Picks plate and a Lynne Perrella one and I stamped them onto painted white wrapping tissue using first Cornflower Blue, Wendy Vecchi Archival Ink then over stamping with Potting Soil to give depth on the one in the foreground. The resin rose peeping over the Lynne Perrella lady's shoulder was painted with Lake Wanaka.
I stamped this Hot Picks iris straight onto the Master-board and coloured it with Fresco washes in Yellow Submarine and Hey Pesto to give a water-colour effect. The butterflies on both cards are die-cut from waxy paper and they have cocktail stick bodies.
As I stamped the Lynne Perrella lady onto card several times in order to 'stack up' the image and give it dimension, I pondered over the details in the image. This pretty lady is a mysterious character with her rather Steam-punk clock-hat and her elegant military jacket with its epaulettes. I could imagine her as a china ornament bought in the 'Swinging Sixties' when I loved to wander along the Kings Road in Chelsea, looking at the little curio shops. My girlhood dream was to open an antique shop with my best friend Sue! I even saved my pocket money and bought a tea caddy with a union jack and a picture of Lord Kitchener on it! What happened to it I don't know, but I've never lost that love of collecting curiosities! Well, thank you for looking at my cards today. I do hope my friends like them!

Saturday, 3 May 2014

Fabric Frenzy!

Hello and Welcome to Magpieheaven! Just a short post today and a sneak peek of a project I have over at Unruly Paper Arts, where the theme is 'Fabric Frenzy'. Do take a look at what the columnists have in store this month and learn about the many ways fabric can become an exciting part of a crafty project.
If you would like to find out what this is and how I made it, then just pop across to UPA here. I'd really appreciate it if you paid a visit and left me a comment. Have a lovely weekend, Julie Ann x.

Thursday, 1 May 2014

Wings to Fly!

Hello and welcome to Magpieheaven! Over on the PA blog, PaperArtsy fans have been showing how talented they are and creating some amazing projects for the #3up Challenge here. Each night three volunteers are selected to work with beautiful, new PaperArtsy products. Please pop across because the standard has been very, very high: you will not be disappointed! I've loved the artists' work with all the new products, but the other day my good friend, Lucy gave me the gift of some of the new Chatsworth papers. They are fabulous to work with, so if you're not sure what to give a crafty friend you couldn't go far wrong with these. Because I've been a GD this semester, I've not joined in the PA challenges lately, so I really wanted to get involved again and I decided to create something using Chatsworth! It's nothing like Gail's Origami style 'make', but she did inspire the theme of flight and I did use PA paper as part of it! Here it is - my Shabby Chic butterfly!
My colour scheme is partly inspired by Gail and partly by that of my kitchen. Ah, don't get me started on that one! Last June a friend who fits kitchens started to work on ours. Soon it will be a year, and we have three out of the planned sixteen cupboards; no work surfaces; a sink that desperately needs replacing; no tiling and walls that need plastering! Something has gone a bit wrong in our dear friend's life maybe or events just keep overtaking him; but he doesn't seem able to tell us about it! We soldier on with what we have, assurances - sometimes - that more will be done, and we can dream! I have now placed my butterfly over the door to the kitchen and it reminds me of how lovely it will all be when it's finished!
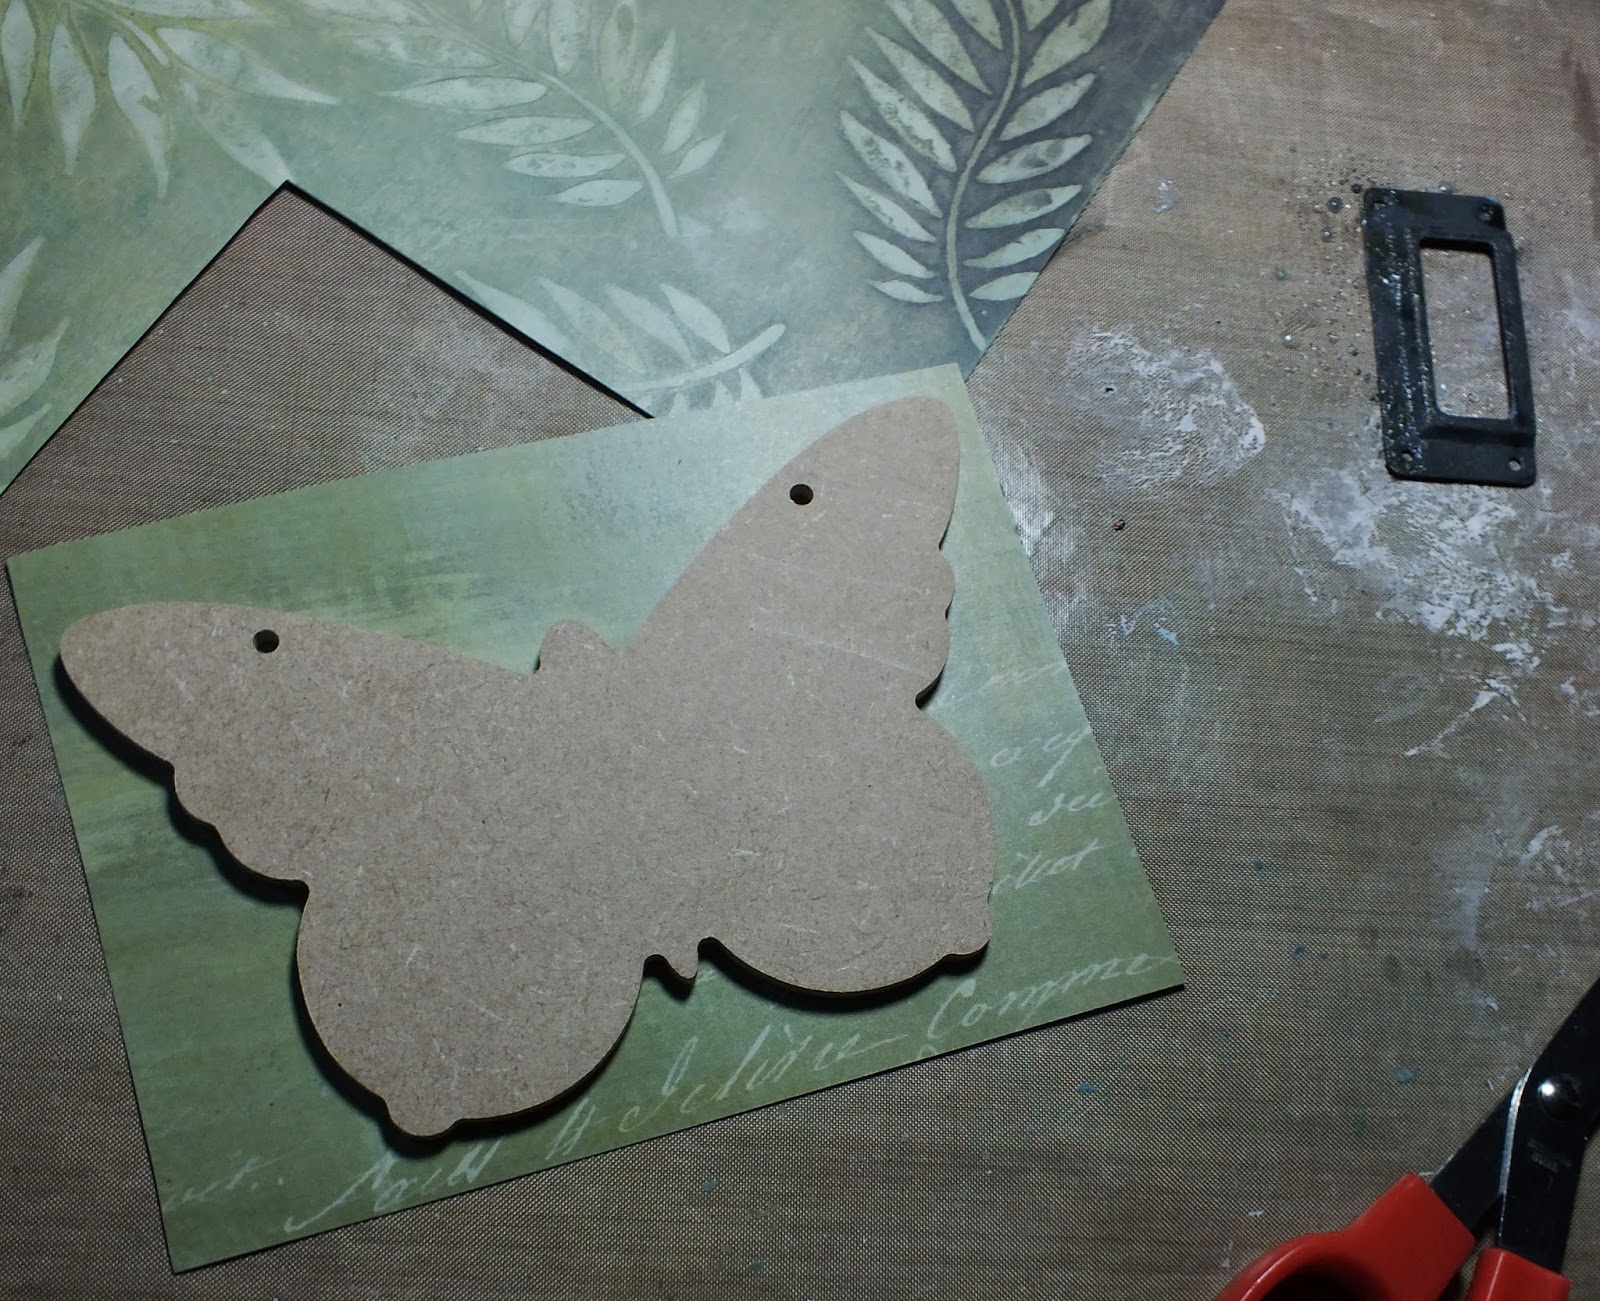
 On a previous blog I told how a demonstrator at Ally Pally taught us to use pretty papers on MDF shapes. I was eager to try this technique again and I had a pack of MDF butterfly shapes. I cut out some Chatsworth, stuck my butterfly face down, making sure my glue - matte multi-medium this time, although in the demo it was PVA - went to the very edge of the shape. I then gave the butterfly a wiggle to dispel air bubbles and trimmed around it roughly before sanding down the edges thoroughly, working in strong downward strokes.
I used some old sand-paper sheets from Mr Magpie's tool cupboard because I needed to be able to get into those fiddly little corners and make everything smooth. Chatsworth is so beautiful, it doesn't exactly need embellishment; but I did want - like Craftyfield - to see how it would look with stamping and Frescos applied.
The butterfly is edged with Hey Pesto Fresco Finish and I used some Sage, watered down in the centre and touches of Chartreuse here and there. I then used the LPC028 script stamp without a block and stamped randomly with Sage Fresco and Wendy Vecchi Potting Soil, Archival ink.
 I flipped the paper over and stamped this sentiment from Ink and the Dog Wings Plate 1 in Potting Soil, embossing it with clear EP. The metal plate is from a pack I bought from the MDF Man and rusted with rusting powder. I used tiny pearls at each corner.
The butterfly is to hang above the door so it can be seen on both sides. On this side I coloured the MDF with Guacamole, Sage, Chartreuse and Hey Pesto and did a little more stamping with LPC028. I again stamped my sentiment on the reverse side of the Chatsworth, but attached it to the centre of a half cotton reel that I bought from PA at Ally Pally - I love these! A little cream hemp cord keeps the butterfly in flight, hovering above our half-finished kitchen with a message of hope for the future! Well, our friend has informed us he is now working on the fourth cupboard door! I should like to enter my butterfly for the PaperArtsy challenge this week. Thank you so much for dropping by. And some day, when the kitchen is completed you're all invited over for tea and home-made cake! If you can't make it, I promise to post pictures on the blog!!! Have  a great weekend and - if you're playing along with the draw - good luck!