you can see how I created it here on the PaperArtsy blog. It would be lovely if you could pop over and take a look. I've had such fun creating it. Thank you Followers and Friends for all the support over the last four months - it's been a great adventure! Thank you also to all those I've come to know over my first year of blogging! Your comments and encouragement have meant so much!
Sunday, 6 April 2014
A Sneak Peek of a Happy Ending!
Hello and welcome to Magpieheaven! It's just a really short post this evening - a sneak peek of my last project for PaperArtsy tonight. If you would like to see more...
Friday, 4 April 2014
A Magpie Blogaversary!
Hello and Welcome to Magpieheaven! Today is a little bit special for me! A year ago I wrote my very first blog! I felt so nervous as I made my first steps into the world of Crafty blogging,and at first I wondered if anyone was out there! Now twelve months on I have made some amazing friends who have taught me so much about creativity! They have opened my eyes to stunning beauty and generosity of spirit! I have been honoured to guest design with the PaperArtsy Family; had tea with Crafty Luce; gone on crafty journeys with Kerry; discovered a Magpie Cousin who lives far away in Canada; got unruly with Paper Arts; made friends with some PATwits; been inspired and uplifted by words and pictures with Alison Bomber; had the honour of sharing Our Creative Corner with some extraordinary artists; done some Fashionable Stamping; dreamed with Dragons and met some Country View Challenges! I know my Magpie Cousin will smile when I recall that one of my first 'makes' was a box all about taking flight! That is exactly what I have done since April 2013!
It was a present for a very dear friend who loves butterflies and birds and I made it as a nest for some earrings I bought her for her! I used the first PaperArtsy Ink and the Dog stamp I ever bought on it, Graphic 45 paper and some Cafe Retro Art Gallery paper cut butterflies!
Here it is all ready to open. I think in those days I probably had just two or three shades of PaperArtsy Fresco paint! I look at these early makes and blush! I would do things differently now! The little swallows on the lid are from a Crafty Individuals plate, another of the first stamp sets I ever bought! I really must play some more with CI stamps!
Here are the earrings on their special card! I loved these exploding boxes from Retro Cafe Art Gallery. I made several of them! One I gave to a friend who had one too many drinks on his birthday and left it in a cab!
I wonder where that incredible cab journey led the little lost box - not to the dustbin, I hope?!
One exploding box went to a friend's son's girlfriend, Amy and also appeared on the Retro Cafe Art Gallery FB page, which was a huge thrill!
Amy was something of a Retro fan so the inside opened up to reveal...a Tim Holtz dress form and lots of images from vintage knitting patterns!
Her favourite colours were pink and grey, I remember.
One of the first artists whose work I loved - even before Lynne Perrella - was Sandra Everstson and the second box I made featured her Petite Whimsy stamps!
I was so exciting when these came all the way from America!
Thank you to my friends and followers. I could not have known quite how much joy blogging and crafting with such lovely people could bring! This last year has had its ups and downs in the real world; but in the magical land that you all help to create. it has been the richest, the most beautiful, the most joyful and the most exciting year of my life!
I was so exciting when these came all the way from America!
I couldn't wait to ink those lovely images!
Saturday, 29 March 2014
Happy Mother's Day!
Hello and Welcome to Magpieheaven! As you may know life has been quite hectic in the Magpies' Nest lately. I realized - thanks to my daughter - that Mother's Day is tomorrow! My mother always joins us for Sunday Lunch so, thanks to Matilda reminding me, I have created a card for this special day, which we can spend together as a family now that my Mum is only just down the road. One of the 'ingredients' on the card is a little unusual this time! My lovely crafting friend, Lesley Ebdon who I chat with on Twitter and who I hope to meet soon at Ally Pally on April 12th sent me a mystery package last week with some material left over from a City and Guilds Fashion Course she once did. I think it is the kind of 'iron-on' gauzy fabric used to reinforce collars, although she no doubt would be able to enlighten me on this. The translucence of it really appealed and suggested butterflies to me! My mum is losing her sight, but if she holds the card up close I hope she will be able to see that unmistakable butterfly shape. I always feel that Spring has well and truly come when the butterflies appear, so ethereal in the hedgerows - and there was something rather ethereal about that fabric Lesley sent when it was cut into a butterfly shape!
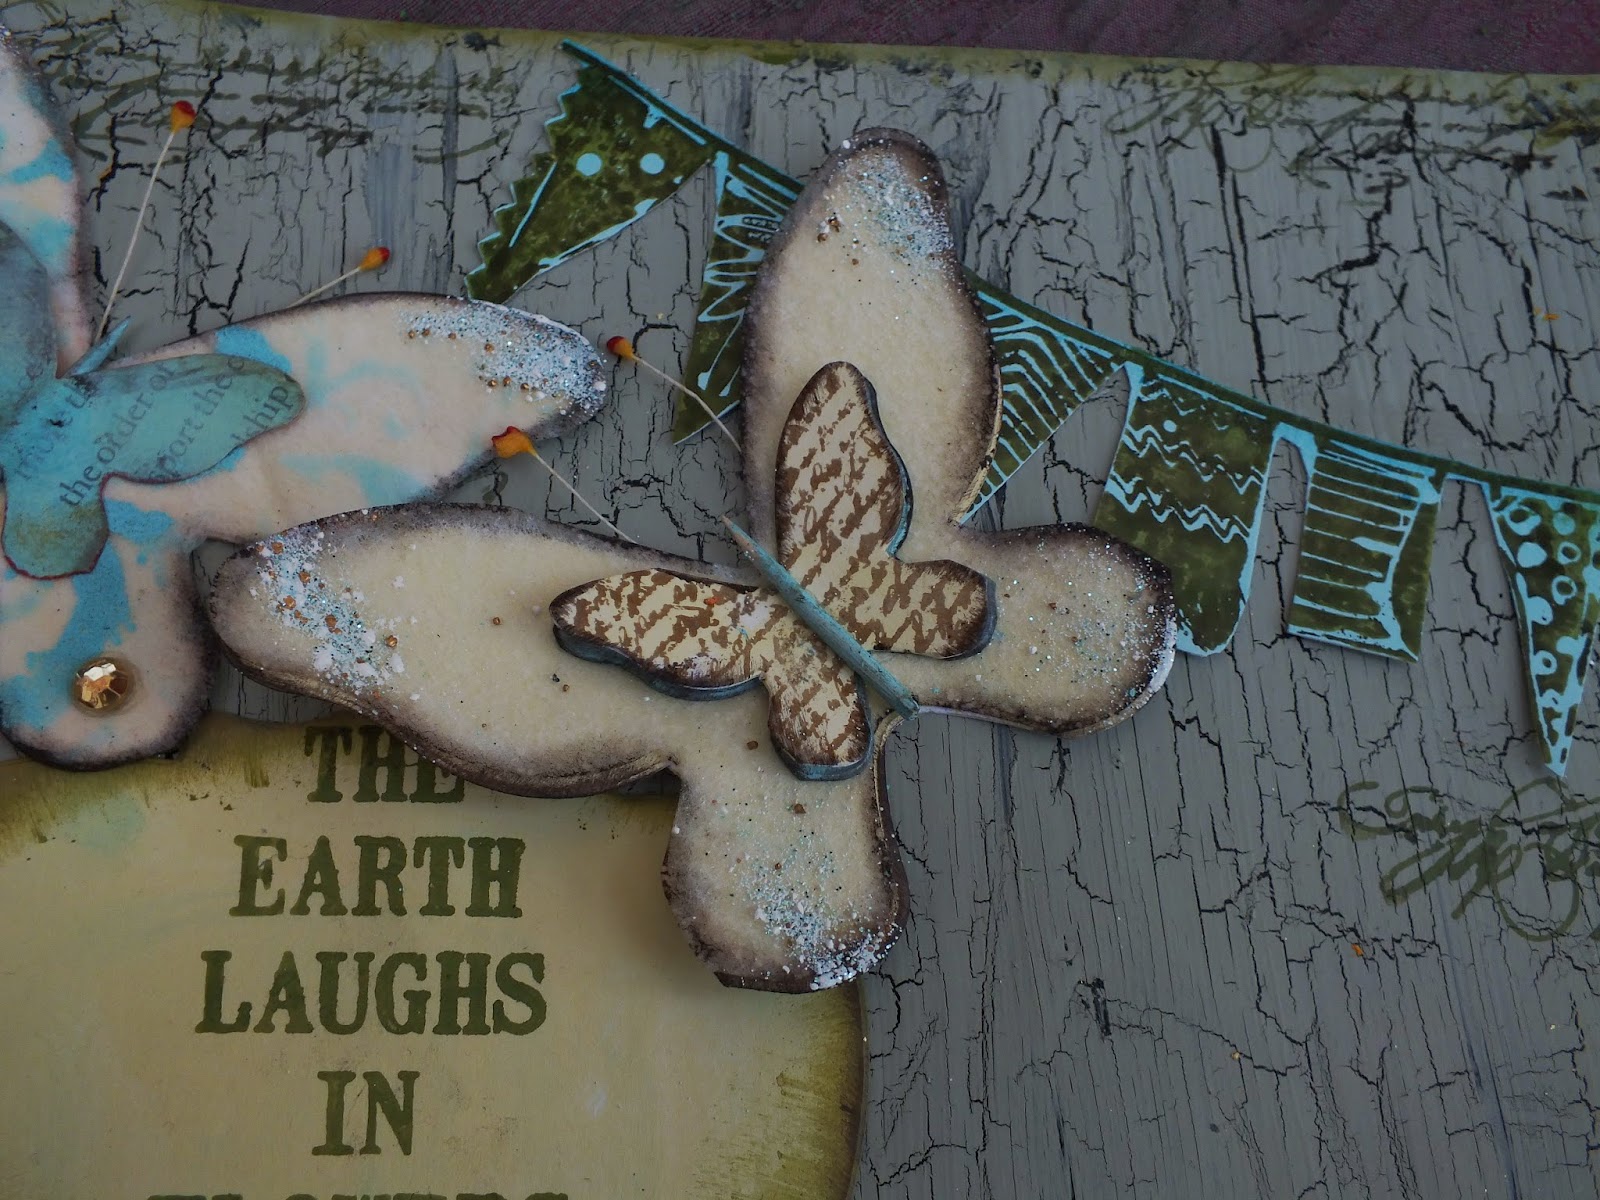
I ran the fabric through my 'Big Shot' with a Sizzix butterfly die and then played around with painting it and adding it as layers. I've edged this layer in the foreground with some French Roast PaperArtsy Fresco. The other two butterflies are Smoothy card painted with Antarctic and Mermaid and then stamped with an Ink and the Dog Mini Script stamp in Versafine Vintage Sepia and a lady from LPC028, one of the new Lynne Perrella stamps from PaperArtsy. You can also see some pieces of cocktail stick painted with Fresco. I used these for the butterflies' bodies, adding some flower centres I had in my stash as antennae.
Here is the finished card! I got so carried away experimenting with effects on the gauzy material combined with paint, Frantage and other layers, I had no time to take step by step photos, but I have taken some detail shots to show how I built up the butterflies. My background is a sheet of card, Crackle Glazed over Little Black dress with Sage Fresco. I love this shade and I've used so much of it, I now need to replenish my supplies! I edged the card with Hey Pesto and stamped some script from LPC028 and a border from LPC012 in Wendy Vecchi, Fern Green Archival ink. The sentiment is from Lin Brown's new Flower Sentiments in the PaperArtsy Eclectica range and the label comes with the butterfly die. I painted it with Vanilla Fresco and edged and stamped it with Fern Green Archival.
The Sizzix die has two sizes of butterfly so I was able to add a second layer that really focused on the lady's eyes. This one is rather like a surreal version of a Peacock butterfly. When you see Peacock butterflies settled in large numbers on a Buddleia their wings always remind me of hosts of bright glittering eyes. I added gems and Frantage in Shabby Blue to the wing tips.
It is difficult to convey in a photograph, but the Frantage worked really well with the gauzy layer. I also did some stenciling over the dress-making gauze on the left-hand butterfly. The bunting floating in the breeze is Wendy Vecchi Fern Green Archival ink stamped on Mermaid Fresco painted card and then 'fussy cut' and attached to the card. The stamp is from LPC005.
I do hope that all the Mums in Crafty Blogland will have a lovely day tomorrow; that those of us whose Mums can spend the day with us will have a really special day and that those whose Mums cannot be with them for whatever reason will have happy memories to celebrate.
I ran the fabric through my 'Big Shot' with a Sizzix butterfly die and then played around with painting it and adding it as layers. I've edged this layer in the foreground with some French Roast PaperArtsy Fresco. The other two butterflies are Smoothy card painted with Antarctic and Mermaid and then stamped with an Ink and the Dog Mini Script stamp in Versafine Vintage Sepia and a lady from LPC028, one of the new Lynne Perrella stamps from PaperArtsy. You can also see some pieces of cocktail stick painted with Fresco. I used these for the butterflies' bodies, adding some flower centres I had in my stash as antennae.
Here is the finished card! I got so carried away experimenting with effects on the gauzy material combined with paint, Frantage and other layers, I had no time to take step by step photos, but I have taken some detail shots to show how I built up the butterflies. My background is a sheet of card, Crackle Glazed over Little Black dress with Sage Fresco. I love this shade and I've used so much of it, I now need to replenish my supplies! I edged the card with Hey Pesto and stamped some script from LPC028 and a border from LPC012 in Wendy Vecchi, Fern Green Archival ink. The sentiment is from Lin Brown's new Flower Sentiments in the PaperArtsy Eclectica range and the label comes with the butterfly die. I painted it with Vanilla Fresco and edged and stamped it with Fern Green Archival.
The Sizzix die has two sizes of butterfly so I was able to add a second layer that really focused on the lady's eyes. This one is rather like a surreal version of a Peacock butterfly. When you see Peacock butterflies settled in large numbers on a Buddleia their wings always remind me of hosts of bright glittering eyes. I added gems and Frantage in Shabby Blue to the wing tips.
It is difficult to convey in a photograph, but the Frantage worked really well with the gauzy layer. I also did some stenciling over the dress-making gauze on the left-hand butterfly. The bunting floating in the breeze is Wendy Vecchi Fern Green Archival ink stamped on Mermaid Fresco painted card and then 'fussy cut' and attached to the card. The stamp is from LPC005.
I do hope that all the Mums in Crafty Blogland will have a lovely day tomorrow; that those of us whose Mums can spend the day with us will have a really special day and that those whose Mums cannot be with them for whatever reason will have happy memories to celebrate.
Wednesday, 26 March 2014
A Zany Tag!
Hello from Magpieheaven! Things have been all aflutter in the nest and consequently a little quiet on the blogging front. I've had a close friend from overseas staying, new students to tutor and several projects to catch up with on my washing-machine work-desk! Now it's time for a new challenge at the Dragons' Dream TIO and I think things might just be back to normal. Please click here to see the fabulous 'Dragons' Dream' inspiration from my team-mates this week! The recipe is chosen by the highly imaginative and creative Sylvia this time and it's to use the letter 'Z'; at least one real, stamped image on your tag - and the twist - a face! Here is my take on Sylvia's challenge.
I must admit I scratched my head a bit over this one! I have quite a few faces in my stamp collection, but I wanted to feature a word beginning with 'Z' and connect it with that face. Then it came to me: zany! In Renaissance, Italian comedy the 'Zannies' were clownish 'fools', there to mimic the other characters in the improvised Commedia dell'arte ! Humour changes so with time that I wonder if we would find their antics funny today? Now, of course, we've taken the word into the English language to mean any quirky or eccentric kind of humour. I collaged my own Zany character, using Lynne Perrella's Collection 003 for the hat and 013 for the face: these are both PaperArtsy stamps.
For my background I sponged with Fresco paints in Mermaid, Bora Bora and South Pacific. I then stenciled with a Prima stencil in Beach Hut. I edged my tag with some dry brushed Chocolate Pudding and French Roast. I then coloured some Grunge Paste with Spanish Mulberry and pushed it through a Crafters' Workshop harlequin stencil. I highlighted my diamonds with some Limited Edition Treasure Gold of a similar shade to the Spanish Mulberry and stamped the script from LPC0028 in Versafine Vintage Sepia randomly without a block. Now it was time for some zaniness.
I painted some card with Spanish Mulberry and stenciled using the flourish stencil and some Mermaid Fresco before stamping the LP hat on it. What could be more bizarre than a hat tilted up to reveal tiny shrink plastic leaves with faces floating up from the clown's empty head? I cut the SP using a Tim Holtz Tattered Leaves die, painted them with a thin wash of Guacamole and then stamped with Black Onyx Versafine. The image is from LPC0028. I rather liked the way the leaf at the top comes to a point and makes the image appear as if she too is wearing a clown's hat! I finished off with some text, painted with Mermaid Fresco and punched out into a lacy pattern.
And it is quite outlandish to encounter a butterfly with wings covered in script! This giant butterfly was cut with a Sizzix die, a blend of Vanilla and Yellow Submarine Fresco. The script is from a PaperArtsy Mini stamp. I used the Tim Holtz Worn Alphabet to stamp my word onto a curled paper banner. The ribbon is dyed seam-binding stamped with a Lynne Perrella sun. The clown looks as if he or she might just break into a smile, or is he or she about to sing 'Give me sunshine in your smile'? I can't wait to see your takes on the recipe this time. The tags that you link are always such an inspiration and the last challenge included a great variety of styles. Wherever you are and whatever you're doing though, whether it be quirky, unconventional or fairly normal, I wish you sunshine - singing in the rain if you prefer that - and lots of smiles!
I must admit I scratched my head a bit over this one! I have quite a few faces in my stamp collection, but I wanted to feature a word beginning with 'Z' and connect it with that face. Then it came to me: zany! In Renaissance, Italian comedy the 'Zannies' were clownish 'fools', there to mimic the other characters in the improvised Commedia dell'arte ! Humour changes so with time that I wonder if we would find their antics funny today? Now, of course, we've taken the word into the English language to mean any quirky or eccentric kind of humour. I collaged my own Zany character, using Lynne Perrella's Collection 003 for the hat and 013 for the face: these are both PaperArtsy stamps.
For my background I sponged with Fresco paints in Mermaid, Bora Bora and South Pacific. I then stenciled with a Prima stencil in Beach Hut. I edged my tag with some dry brushed Chocolate Pudding and French Roast. I then coloured some Grunge Paste with Spanish Mulberry and pushed it through a Crafters' Workshop harlequin stencil. I highlighted my diamonds with some Limited Edition Treasure Gold of a similar shade to the Spanish Mulberry and stamped the script from LPC0028 in Versafine Vintage Sepia randomly without a block. Now it was time for some zaniness.
I painted some card with Spanish Mulberry and stenciled using the flourish stencil and some Mermaid Fresco before stamping the LP hat on it. What could be more bizarre than a hat tilted up to reveal tiny shrink plastic leaves with faces floating up from the clown's empty head? I cut the SP using a Tim Holtz Tattered Leaves die, painted them with a thin wash of Guacamole and then stamped with Black Onyx Versafine. The image is from LPC0028. I rather liked the way the leaf at the top comes to a point and makes the image appear as if she too is wearing a clown's hat! I finished off with some text, painted with Mermaid Fresco and punched out into a lacy pattern.
And it is quite outlandish to encounter a butterfly with wings covered in script! This giant butterfly was cut with a Sizzix die, a blend of Vanilla and Yellow Submarine Fresco. The script is from a PaperArtsy Mini stamp. I used the Tim Holtz Worn Alphabet to stamp my word onto a curled paper banner. The ribbon is dyed seam-binding stamped with a Lynne Perrella sun. The clown looks as if he or she might just break into a smile, or is he or she about to sing 'Give me sunshine in your smile'? I can't wait to see your takes on the recipe this time. The tags that you link are always such an inspiration and the last challenge included a great variety of styles. Wherever you are and whatever you're doing though, whether it be quirky, unconventional or fairly normal, I wish you sunshine - singing in the rain if you prefer that - and lots of smiles!
Tuesday, 25 March 2014
Tea with Lucy.
Hello from Magpieheaven! It feels like ages since I last blogged! Life has been hectic here in the Magpies' Nest with visitors to entertain and tutoring to be done - not to mention all the catching up on projects I've had to do - still not sure when I'm going to fit in the housework! Yesterday, though, I took time out to meet up with a lovely crafting friend, Lucy Edmondson of 'True Colours'. We first met at Ally Pally last September. Yesterday we met in Richmond mid-morning and spent the day together, laughing, drinking tea and coffee and - you'll no doubt be surprised to hear - talking! I really thought my eyes were playing tricks when Lucy checked on the time and it was 4.00pm! There wasn't a moment to spare to take any photos, but what I have photographed are the beautiful gifts Lucy gave me! I was so moved by her generosity. I hope I have done justice to these gorgeous things.
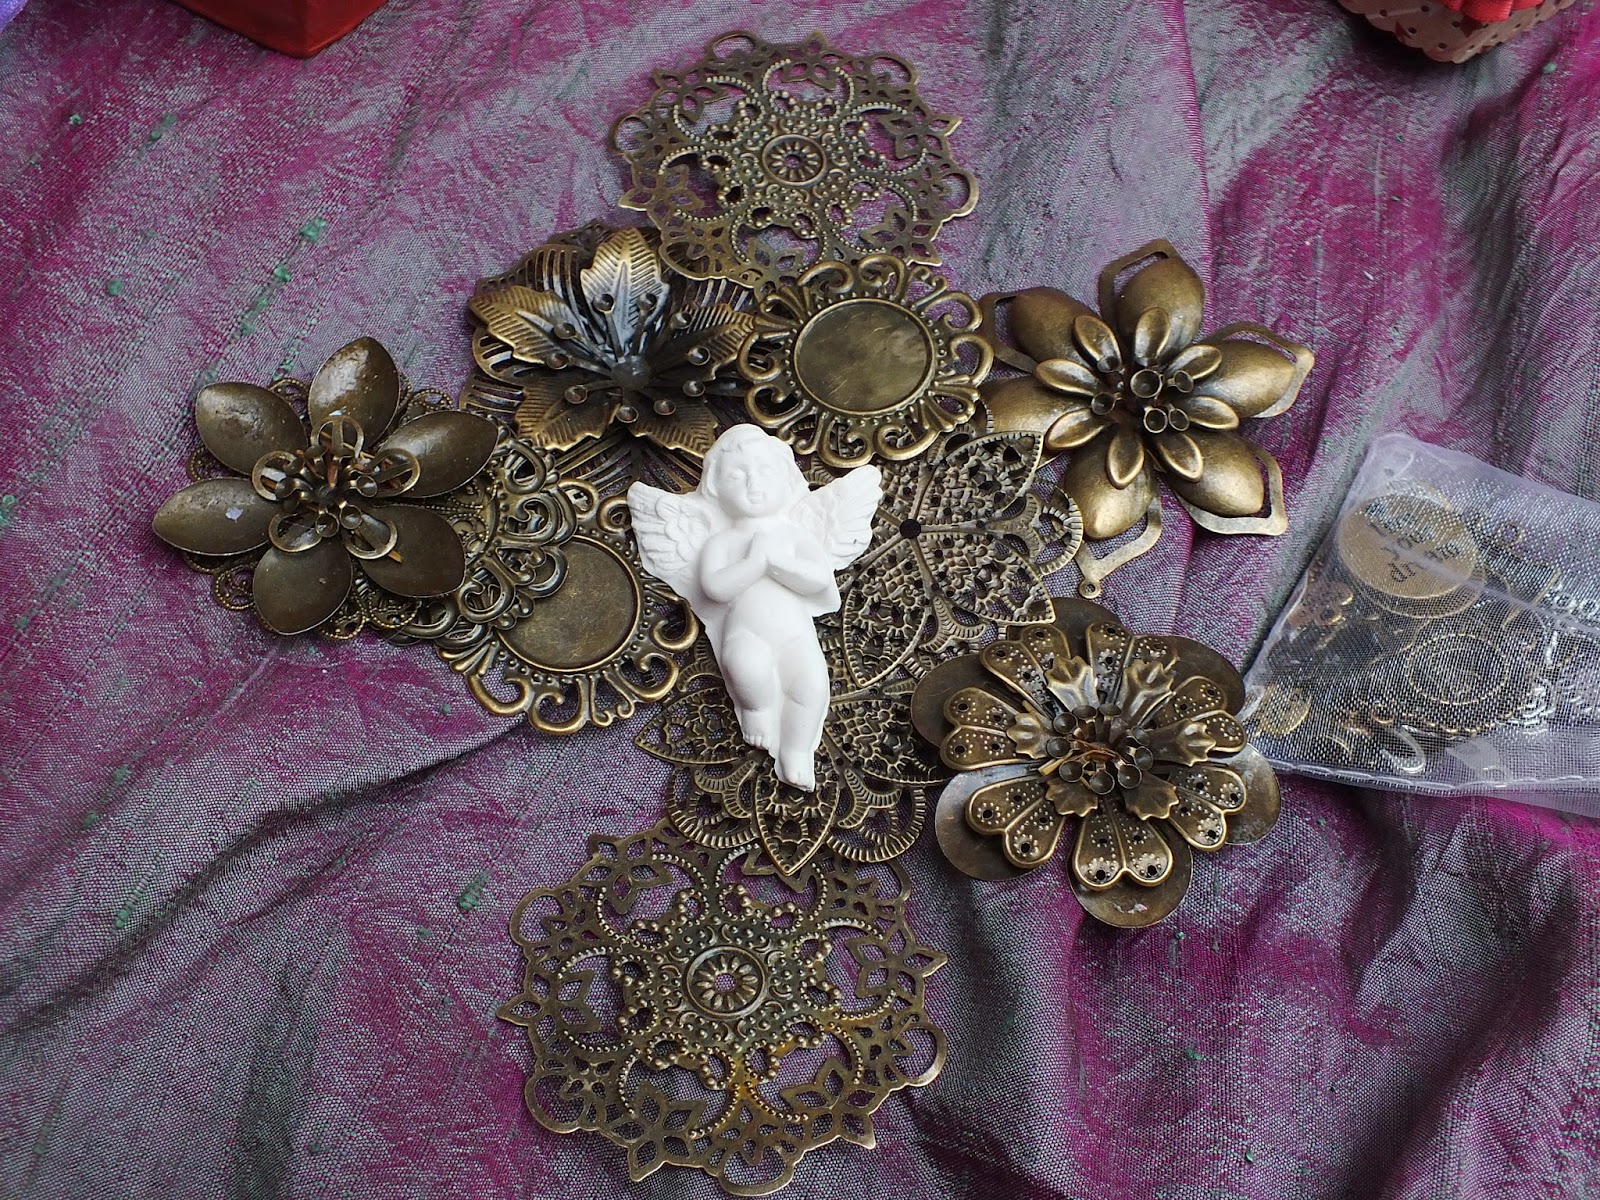
Isn't that the loveliest shape? The flowers are a fabulous texture too and I loved the effect of the centres! I was lost for words as I opened it - very unusual for me - as Lucy was probably beginning to discover - if she hadn't worked that out already, of course! I hope she realized how much I loved it!
Just look at the treasures inside! One thing I never seem to have enough of are embellishments. Lucy made this exquisite little cherub and the flowers and charms are fabulous!
I can't wait to use them!
But loveliest of all, Lucy very generously gave me her artwork for Crafty Individuals Fine Romance Challenge! I shall really treasure this!
Those flowers are incredible and the crackle is stunning! If only you could see the Mica in real life!
Isn't that the loveliest shape? The flowers are a fabulous texture too and I loved the effect of the centres! I was lost for words as I opened it - very unusual for me - as Lucy was probably beginning to discover - if she hadn't worked that out already, of course! I hope she realized how much I loved it!
Just look at the treasures inside! One thing I never seem to have enough of are embellishments. Lucy made this exquisite little cherub and the flowers and charms are fabulous!
I can't wait to use them!
But loveliest of all, Lucy very generously gave me her artwork for Crafty Individuals Fine Romance Challenge! I shall really treasure this!
Those flowers are incredible and the crackle is stunning! If only you could see the Mica in real life!
I can't wait to create something especially for Lucy now to say a big 'Thank You' for her friendship.
Thank you too for stopping by Magpieheaven today. April 4th will see the very first anniversary of my blog and I have to say that entering the wonderful world of Craft Blogging has opened my eyes to so much beauty all around me and introduced me to so many amazing, talented and generous new friends. Thank you so much, Lucy and Crafty Bloggers all!
Sunday, 16 March 2014
A Tim Holtz Amazon!
Hello and welcome to Magpieheaven! It's been a busy week for me, full of little Green Men! No, we haven't had a Martian invasion, I've been lucky enough to be guesting over at PaperArtsy and my theme has been The Green Man! It's been such fun looking at the beautiful interpretations people have come up with! I've also been dying to enter a new challenge and I seriously began to doubt that I would have time, as I've also been very busy with my English tutoring. Then I grabbed some time and this is what I created. Can you guess the new Challenge I'd like to link it up with?
There's quite a bit of Tim Holtz influence on this, so that should be a clue! Yes, it's the wonderful brand new Vintage Journey Challenge, which you can find out about here! Do pop over and take a look! They have a wonderful team with some great vintage inspiration on offer. This challenge is to create something in a Vintage style with a strong Tim Holtz content! I've been a huge fan of Tim's style and the creative journey he encourages us to take ever since I started blogging about a year ago. I thought I had the exact idea of where I wanted to go with this tag, but - like all the best journeys - this one changed direction along the way!
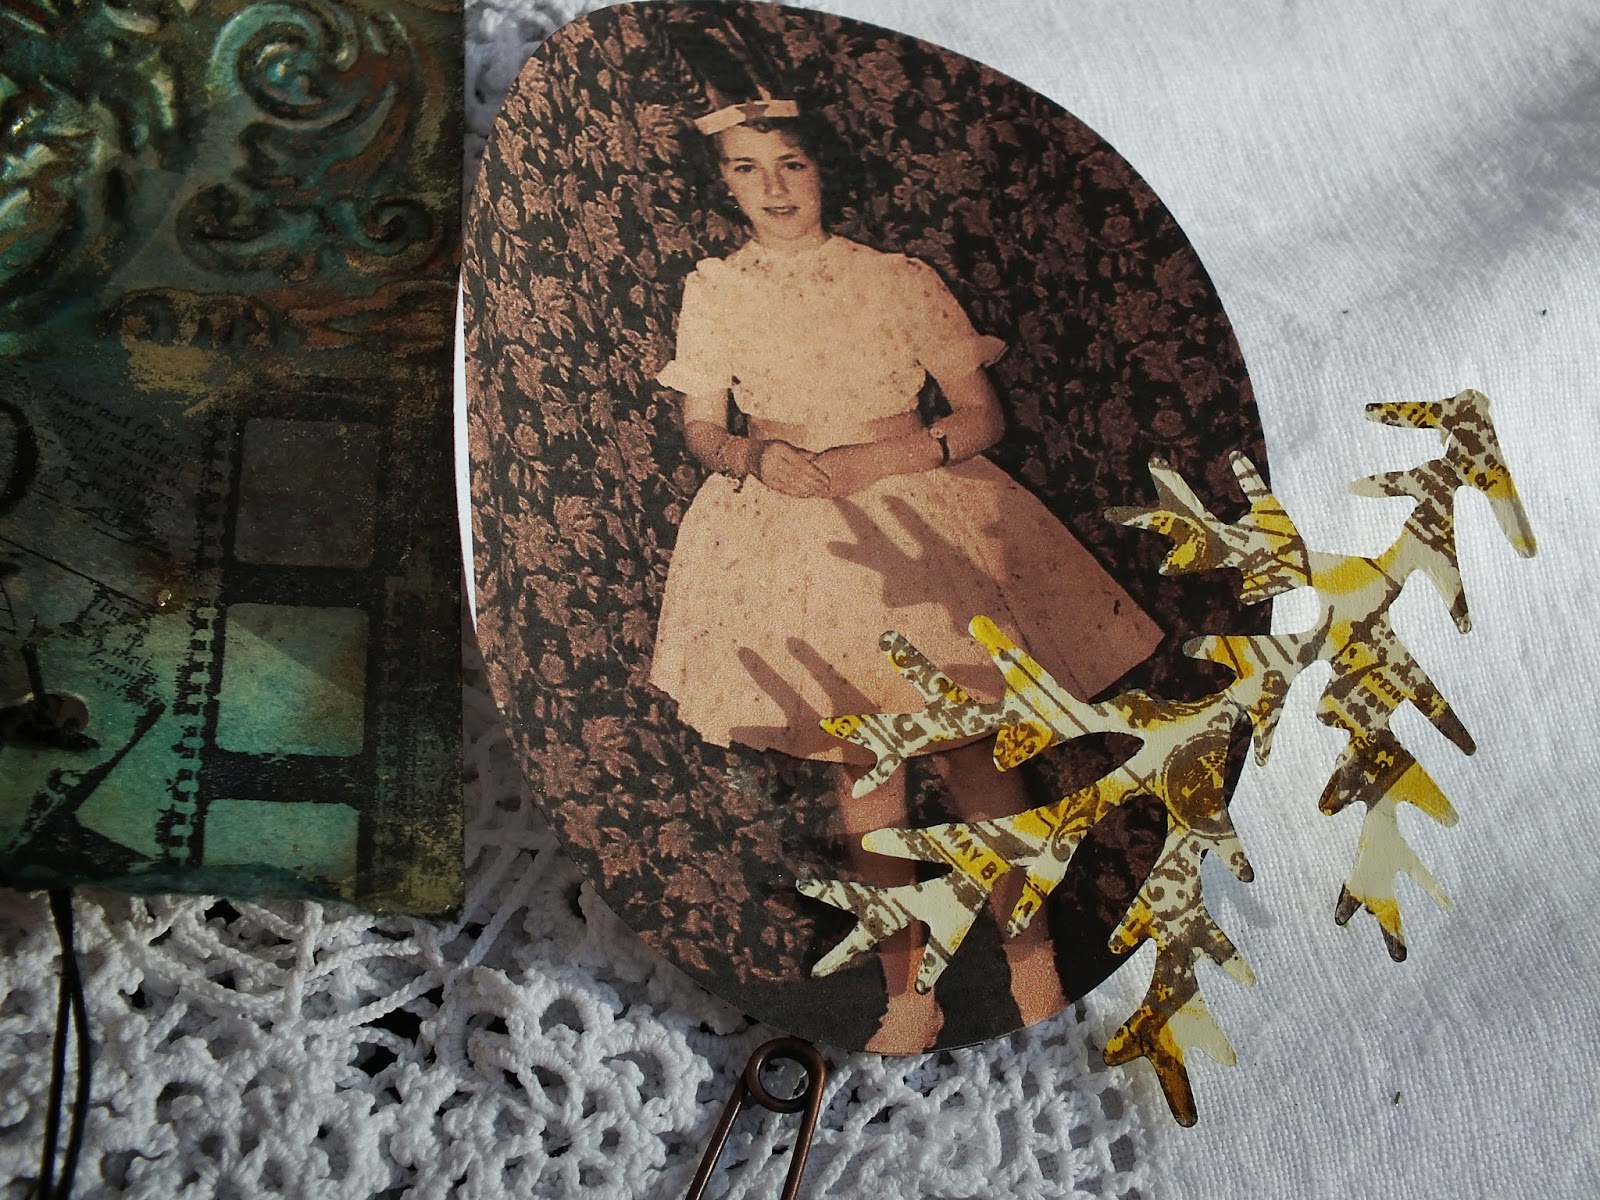
I loved the pattern on those stage curtains and my feather headdress that said 'Woman Warrior' but didn't really 'go' with the girly party dress! I was small and quiet as a little girl, but I felt like a hero inside; it always annoyed me that the boys in stories got to do all the interesting things and I was always on the side of the Native Americans when I watched Westerns on Sunday afternoon TV. I intended to make this picture the focal point of my Tim Tag until the creative process took over and I began to think about my journey into adulthood and how it was like learning to be a Woman Warrior! The little girl with the feathers might be behind this tag, but should she take centre stage?
I put her to one side and started to make a little 'purse' for her to carry on her journey. I swiped a #7 tag through distress inks - Vintage Photo, a little Fired Brick, Squeezed Lemonade and stamped with Tim Holtz's Como19 Photograph in Black Archival Ink. I added some Idealogy details, a gem clip and a 'Destiny' tag along with a little feather. That purse was going to carry all I needed for my journey: Courage, Honesty and Adaptability! Sometimes I remembered to dip into the purse and use them, sometimes it would feel like they were all used up!
Here is my tag that I would attach the purse to. It soon seemed to resemble a dark forest. The leaves from those curtains were forming themselves into real leaves and branches, closing in on winding paths I must navigate my way through! I swiped through Vintage Photo, Peeled Paint and Peacock Feathers and edged with Walnut Stain. The Leaf is one of Tim Holtz's Tattered Leaves dies, cut from Shrink Plastic painted with a wash of PaperArtsy Fresco in Guacamole and edged with Walnut Stain Distress Ink. The rose at the centre of the 'Forest' is made from card die-cut with Tim's Tattered Pinecone and then stamped with Tim's Como19 again and edged in Peacock Feathers Distress. I accented the swirls with some Treasure Gold in Aquamarine, White Fire and Classic.
Then came the Change of Direction! That little girl wasn't right. I needed an image that emerged from the leaves of the Forest, strong and Amazonian! I took up one of my favourite Tim stamps! SCF005.
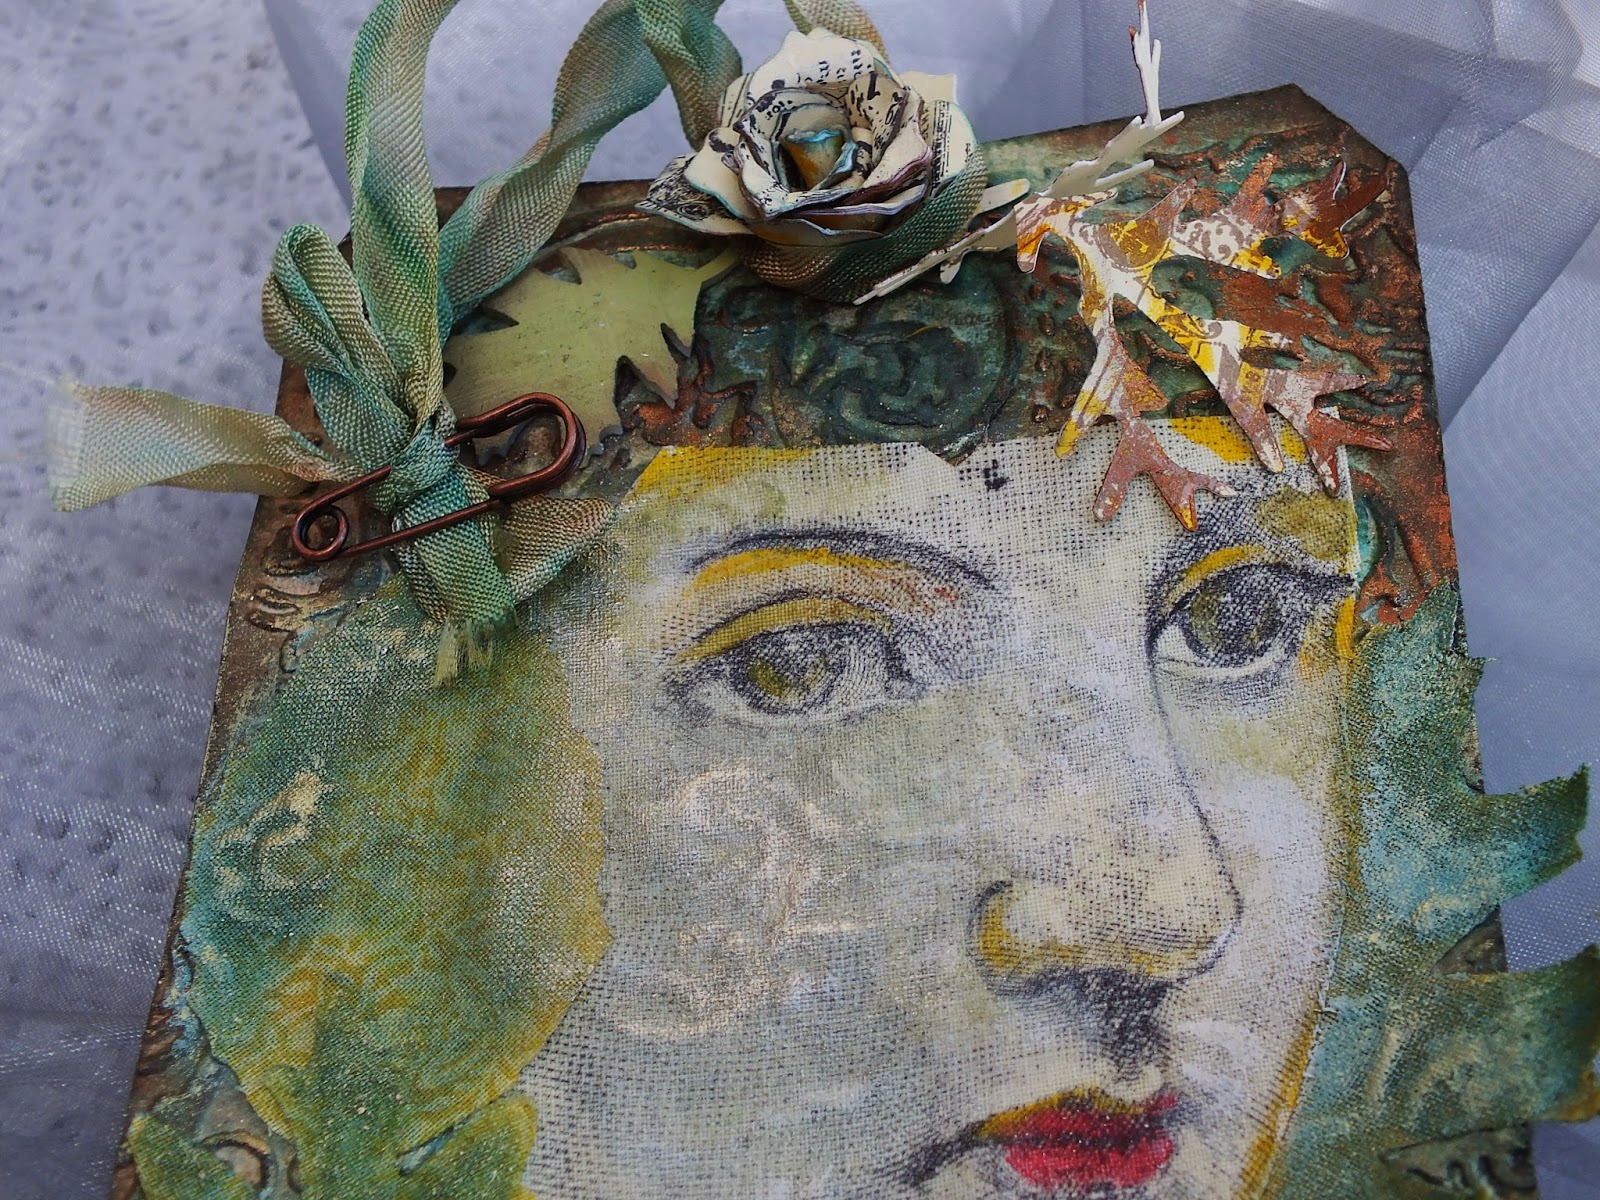
I stamped the face, which I think looks pensive but strong onto cream fabric and painted it with layers of Frescos blended with Fabric Medium and Distress Inks, glazing with Satin Glaze and - when it was dry - touches of Treasure Gold. I also die-cut some Tattered Leaves from yellow fabric and treated these in the same way!
I knew just the sentiment I wanted that happens to go with the image I had chosen in SCF005. I stamped this onto an oval piece of card, spritzed and flicked with Broken China and Vintage Photo and edged with Walnut Stain and a little Treasure Gold. The words are stamped in Black Ranger Archival and then embossed with clear EP. I added some Tim jump rings around two red pearls.
The little leaf peeping from the purse was punched from painted card then coated with Versamark and clear UTEE and heated.
Some dyed seam-binding with an Idealogy pin completed the tag.
I touched areas where the embossing showed through the fabric with Treasure Gold to create the impression of dappled Forest light and shadow. Here is my tag hanging in my 'Tag Vase' in the Magpieheaven living room. I should like to link this to the Vintage Journey Anything Tim Challenge . Thank you so much for patiently looking at all these images and listening to the story of a tag!
There's quite a bit of Tim Holtz influence on this, so that should be a clue! Yes, it's the wonderful brand new Vintage Journey Challenge, which you can find out about here! Do pop over and take a look! They have a wonderful team with some great vintage inspiration on offer. This challenge is to create something in a Vintage style with a strong Tim Holtz content! I've been a huge fan of Tim's style and the creative journey he encourages us to take ever since I started blogging about a year ago. I thought I had the exact idea of where I wanted to go with this tag, but - like all the best journeys - this one changed direction along the way!
I started out with a picture of myself in the '60s, two tags and an embossing folder!
I put her to one side and started to make a little 'purse' for her to carry on her journey. I swiped a #7 tag through distress inks - Vintage Photo, a little Fired Brick, Squeezed Lemonade and stamped with Tim Holtz's Como19 Photograph in Black Archival Ink. I added some Idealogy details, a gem clip and a 'Destiny' tag along with a little feather. That purse was going to carry all I needed for my journey: Courage, Honesty and Adaptability! Sometimes I remembered to dip into the purse and use them, sometimes it would feel like they were all used up!
Here is my tag that I would attach the purse to. It soon seemed to resemble a dark forest. The leaves from those curtains were forming themselves into real leaves and branches, closing in on winding paths I must navigate my way through! I swiped through Vintage Photo, Peeled Paint and Peacock Feathers and edged with Walnut Stain. The Leaf is one of Tim Holtz's Tattered Leaves dies, cut from Shrink Plastic painted with a wash of PaperArtsy Fresco in Guacamole and edged with Walnut Stain Distress Ink. The rose at the centre of the 'Forest' is made from card die-cut with Tim's Tattered Pinecone and then stamped with Tim's Como19 again and edged in Peacock Feathers Distress. I accented the swirls with some Treasure Gold in Aquamarine, White Fire and Classic.
Then came the Change of Direction! That little girl wasn't right. I needed an image that emerged from the leaves of the Forest, strong and Amazonian! I took up one of my favourite Tim stamps! SCF005.
I stamped the face, which I think looks pensive but strong onto cream fabric and painted it with layers of Frescos blended with Fabric Medium and Distress Inks, glazing with Satin Glaze and - when it was dry - touches of Treasure Gold. I also die-cut some Tattered Leaves from yellow fabric and treated these in the same way!
I knew just the sentiment I wanted that happens to go with the image I had chosen in SCF005. I stamped this onto an oval piece of card, spritzed and flicked with Broken China and Vintage Photo and edged with Walnut Stain and a little Treasure Gold. The words are stamped in Black Ranger Archival and then embossed with clear EP. I added some Tim jump rings around two red pearls.
The little leaf peeping from the purse was punched from painted card then coated with Versamark and clear UTEE and heated.
Some dyed seam-binding with an Idealogy pin completed the tag.
I touched areas where the embossing showed through the fabric with Treasure Gold to create the impression of dappled Forest light and shadow. Here is my tag hanging in my 'Tag Vase' in the Magpieheaven living room. I should like to link this to the Vintage Journey Anything Tim Challenge . Thank you so much for patiently looking at all these images and listening to the story of a tag!
Wednesday, 12 March 2014
Dreaming with the Dragons - it's metal and the letter C!
Hello and welcome to Magpieheaven where it's time to dream with the Dragons again. This week it's the turn of the very talented Helen to challenge us with the combination of metal and the letter 'C'. The usual rule of at least one real stamped image still applies, so why not take a look here and see what great ideas the rest of the Team have come up with as inspiration? The first thing that sprang into my mind when I read this fortnight's challenge was the word 'crown'. Then I thought of metal frames and looking-glasses, little houses deep in the woods and beautiful but insecure Queens with magic powers, who can turn very nasty!
Is the beautiful lady gazing out at us, Snow-white or the Queen herself, once the fairest in the Land soon to be eclipsed by her young step-daughter's loveliness? Is the tiny metal crown above her head a prediction of Snow-white's marriage to a prince, or a memory of when the Wicked Queen was once the unchallenged Beauty Queen of the Realm? I'll leave it to you to decide, while I explain how I made my tag!
I love the idea of how fairy-tales often have their roots in the forest. I read a fascinating book about this by Sara Maitland called 'Gossip from the Forest', which always makes me imagine the trees whispering stories to each other. I chose a range of Fresco greens and some Inky Pool Fresco which I have been using in a spray,
I fell in love with this gorgeous stencil of birch woods by Clear Scraps back in December but I haven't used it since Christmas. I decided to create a forest just on the eve of Spring, like now!
I sponged Hey Pesto through my stencil onto my blended background of Honey Dew with Guacamole over it.
The next step, after I'd built up layers of different translucent greens, was to die cut a frame from metal covered card and emboss it.
The layers I chose were Chartreuse, Limelight and a touch of Hyde Park around the edge, spraying with blue. I then used Grunge Paste through my stencil, washing it quickly afterwards. When this was dry, I applied Treasure Gold in Green Amber, Aquamarine and White Fire.
For my focal image I die-cut an oval of card that fits with my frame and painted it with the same background and stencil as my tag. I then stamped this Lynne Perrella lady on it in Black Onyx Versafine, heat-set and added some more colour to give depth: Tikka around the contours of the lady's head and some Antarctic over Lake Wanaka on her collar and a little Lake Wanaka around the edge of her face. I added script stamped in Olympia Green and some tiny punched out leaves.
The little metal crown is from Retro Cafe Art Gallery. I embedded it in Grunge Paste and Heavy Gel Medium and then stuck the punched out leaves over the top so that it seems to be appearing out of the leaves above the frame . The little tag is one I made from card I had painted and stenciled with Lin Brown's new leafy stencil and stamped with Lynne Perrella crowns, edged with some gold UTEE and finished off with a verdi-gris embossed 'C' from the Tim Holtz Worn Alphabet, which I love.
A Prima Mechanical with an amber gem, painted with some Green Amber Treasure Gold suggested a brooch from the Wicked Queen's treasures.
Thank you so much for stopping by to look at my tag for Dragons Dream TIO. Do pop over and take a look at the great tags the other DTs came up with and see if you can find some metal in your stash and a letter 'C' - you don't even have to think of a word - and play along with the Dragons by adding your link. Maybe your tag will be chosen as one of the Dreamboat Three. Have fun and be careful who you accept apples from!
Is the beautiful lady gazing out at us, Snow-white or the Queen herself, once the fairest in the Land soon to be eclipsed by her young step-daughter's loveliness? Is the tiny metal crown above her head a prediction of Snow-white's marriage to a prince, or a memory of when the Wicked Queen was once the unchallenged Beauty Queen of the Realm? I'll leave it to you to decide, while I explain how I made my tag!
I love the idea of how fairy-tales often have their roots in the forest. I read a fascinating book about this by Sara Maitland called 'Gossip from the Forest', which always makes me imagine the trees whispering stories to each other. I chose a range of Fresco greens and some Inky Pool Fresco which I have been using in a spray,
I fell in love with this gorgeous stencil of birch woods by Clear Scraps back in December but I haven't used it since Christmas. I decided to create a forest just on the eve of Spring, like now!
I sponged Hey Pesto through my stencil onto my blended background of Honey Dew with Guacamole over it.
The next step, after I'd built up layers of different translucent greens, was to die cut a frame from metal covered card and emboss it.
The layers I chose were Chartreuse, Limelight and a touch of Hyde Park around the edge, spraying with blue. I then used Grunge Paste through my stencil, washing it quickly afterwards. When this was dry, I applied Treasure Gold in Green Amber, Aquamarine and White Fire.
For my focal image I die-cut an oval of card that fits with my frame and painted it with the same background and stencil as my tag. I then stamped this Lynne Perrella lady on it in Black Onyx Versafine, heat-set and added some more colour to give depth: Tikka around the contours of the lady's head and some Antarctic over Lake Wanaka on her collar and a little Lake Wanaka around the edge of her face. I added script stamped in Olympia Green and some tiny punched out leaves.
The little metal crown is from Retro Cafe Art Gallery. I embedded it in Grunge Paste and Heavy Gel Medium and then stuck the punched out leaves over the top so that it seems to be appearing out of the leaves above the frame . The little tag is one I made from card I had painted and stenciled with Lin Brown's new leafy stencil and stamped with Lynne Perrella crowns, edged with some gold UTEE and finished off with a verdi-gris embossed 'C' from the Tim Holtz Worn Alphabet, which I love.
A Prima Mechanical with an amber gem, painted with some Green Amber Treasure Gold suggested a brooch from the Wicked Queen's treasures.
Thank you so much for stopping by to look at my tag for Dragons Dream TIO. Do pop over and take a look at the great tags the other DTs came up with and see if you can find some metal in your stash and a letter 'C' - you don't even have to think of a word - and play along with the Dragons by adding your link. Maybe your tag will be chosen as one of the Dreamboat Three. Have fun and be careful who you accept apples from!
Subscribe to:
Posts (Atom)