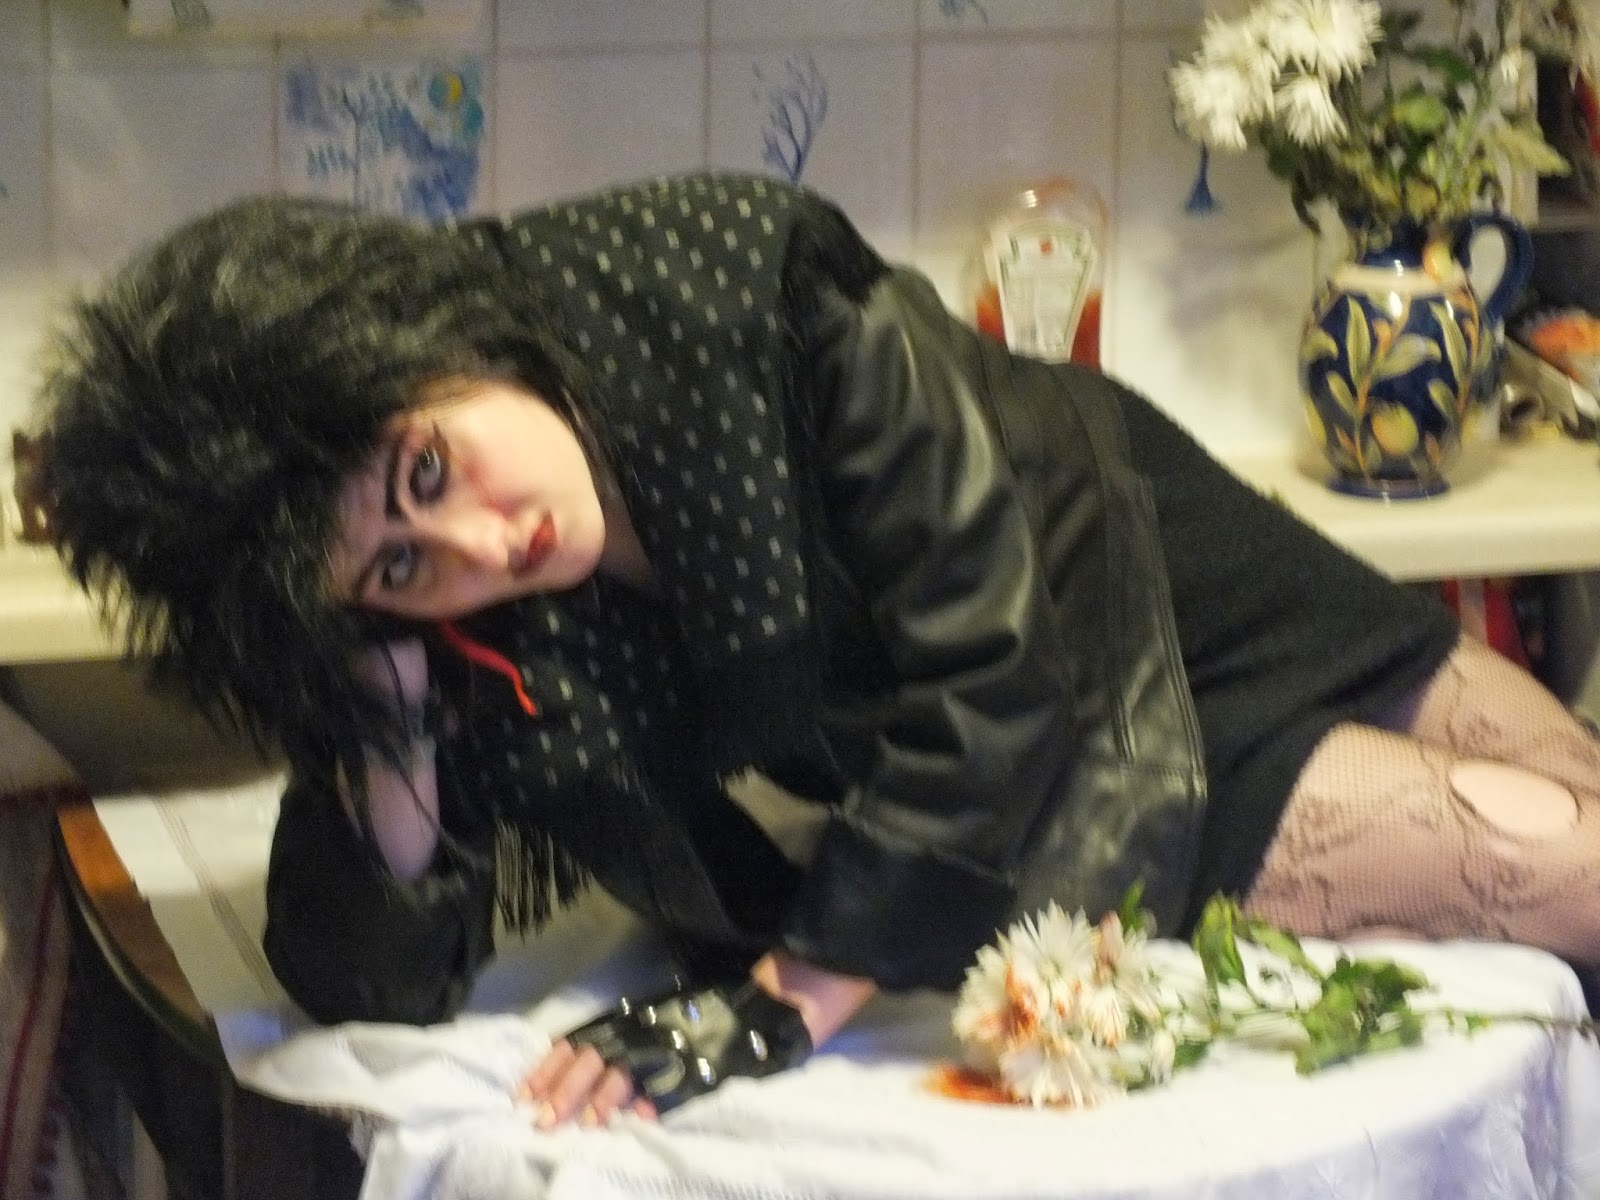
This is a photo in its raw state. The final project has been refined and processed into a double-page fashion spread meant to 'showcase' the jacket. Below is my washing machine with my recent tags for the Funkie Junkie Challenge and another card. Progress is slow, but I think I'm getting there - I'm keeping calm, anyway.
Wednesday, 11 December 2013
WOYWW - Siouxsie on my Kitchen Table and Christmas Cards on my washing machine!
Good Morning and welcome to Magpieheaven! Thank you to my newest followers for joining me on my crafting odyssey. I do hope you'll be able to pop in often. What's on your workbench today? Is it Christmassy? Or are you so well organized that you can sit back and compose a list of New Year's Resolutions all ready for January 1st? If you wonder why I'm about to disclose the extraordinary apparition on my table and the little festive collection on my washing machine just pop over to Julia's amazing Stamping Ground and find out all about WOYWW! I'm sure you know all about this brilliant blog-hop that forges friendships and encourages snooping - oops, sorry - INTEREST in the work of others, but in case you don't: do look it up and join in when you can! And now, without further ado, here is a glimpse of my unfinished kitchen - no closer to completion than it was last month, but with my daughter's friend, Kat elegantly posed across my kitchen table - or is it really Siouxsie Sioux? Last week some 'deskers' asked to see Matilda's Siouxsie shoot that she decided should take place in our Work-In-Progress kitchen, one or two actually professed to having been fans back in the day! Well, how convincing is she? I think she's a 'dead ringer' for the 'seventies' star; but what do you think? By the way Kat's wearing a wig and the dress was from a Retro shop, the jacket from the college wardrobe. She doesn't normally look like this or sprawl across our table! And Matilda hadn't even heard of SS until she was given the brief to create a fashion shoot inspired by her 'look'! Imagine - she had to do historical research into the days of my youth! Eek!
Thank you so much to my followers, old and new and my 'desker' friends. It's so lovely to have you drop by and although I have to scoot off now - no I haven't bought all my Christmas gifts yet! I will try to get round to visiting as many of you as I can.
Tuesday, 10 December 2013
Funkie Junkie 12 Tags of Christmas #6
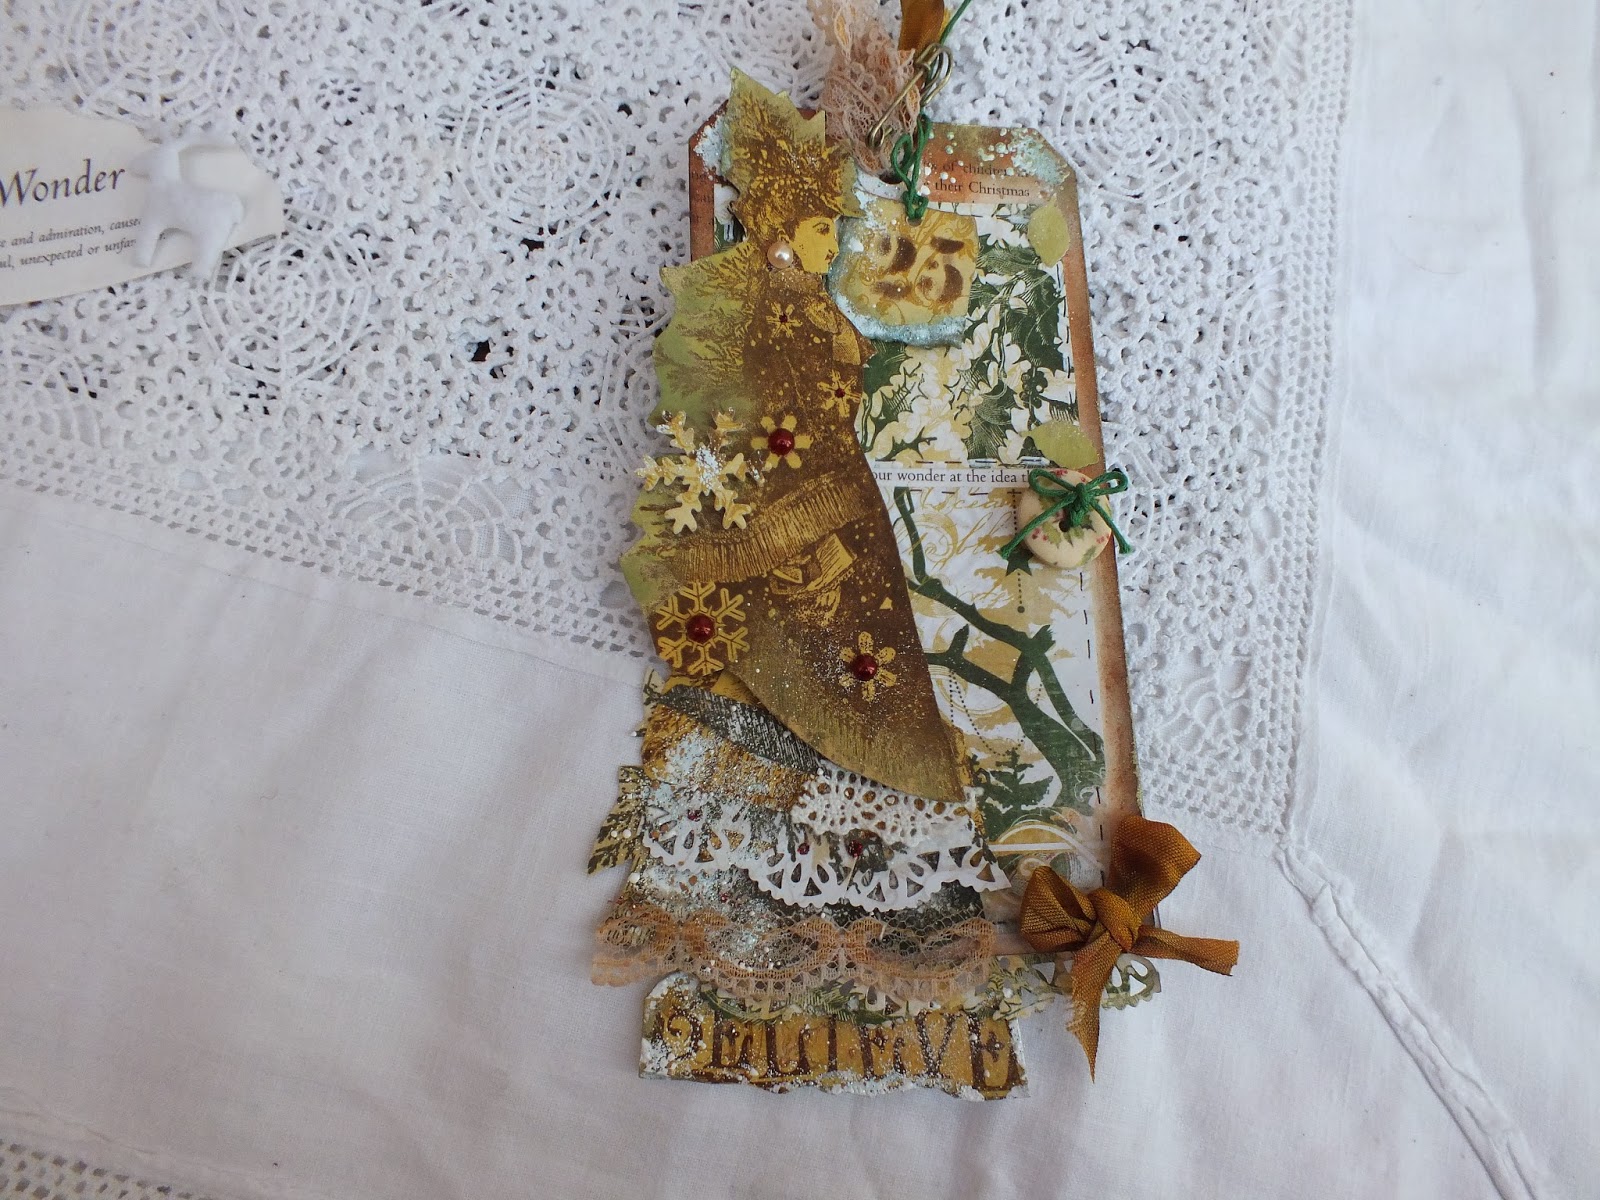
Welcome to Magpieheaven, where I'm still gaining lots of fresh inspiration from Linda Coughlin's beautiful 12 tags of Christmas. I am loving creating these tags and the vase above my mantel-piece is gradually filling up with twigs heavy with glittering tags. If you would like to play along with Linda's challenge then click HERE, there is still time to join in: you have until December 22nd and it can be any Christmas themed make. Why not drop by the Funkie Junkie boutique and check out some of the lovely crafting goodies on sale here. The tag that inspired me this time is Linda's Tag #6, which you can see here. I love Linda's composition so I took my inspiration from the way Linda composed her tag and balanced the different elements. I also wanted to include that all important 25 on my tag too. Apart from that, I just went where the inspiration took me. Linda's tag had the strong central image of a Christmas tree. I had no die that resembled this beautiful, fluid shape, but I did have a lovely Lynne Perrella stamp from LPC 016 of an Edwardian lady who looks as if she is metamorphosing into a fir tree, or is the tree morphing into a lady? I've always been intrigued by this stamp and wondered if there is a story behind it.
I die-cut my tag from card and then die-cut another one out of the text from my Christmas book and stuck this over the top. I chose a page about the 'wonder' of Christmas. You can just see a little scrap from the page on the left of the top image. I then sponged the tag with Vintage Photo Distress Ink. Linda's tag had two squares of machine stitching, top and bottom. I cut two squares from some Bo Bunny Silver and Gold paper and doodled stitches around them. I couldn't resist adding some Shabby Blue Frantage to the corners.
I added little frosted leaves painted with Paper Artsy Hey Pesto Fresco, a colourful Christmas button with some red waxed thread and some seam binding dyed with Vintage Photo and tied in a little bow. Linda's tag had a beautiful button and big ribbon bow, but as my tag is smaller I kept to buttons and bows but arranged them a little differently and went for a smaller scale. The top of my tag is finished off with some tea-dyed lace, seam binding and an idealogy pin. My Edwardian lady was an imaginative combination of fir tree and drapery, so I stamped her onto different cards and papers in Wendy Vecchi Potting Soil Archival. I edged her with Green Amber Treasure Gold and gave her a dry distress glitter choker and a pearl earring.
I added extra punched out snowflakes with Frantage, some red pearls and some ruby Stickles.
I combined real tea-dyed lace with paper lace and layered the lady using little foam pads to give her dimension.
It's difficult to show the subtle glitter effects that can be achieved with dry distress glitter. The fir tree lady really shimmers as the tag catches the light. The final layer of her skirt has the 'Believe' sentiment on it from Paper Artsy Lynne Perrella Collection 016, which seemed appropriate to the theme of my fifth tag, which is the wonder of Christmas. I love how mysterious the lady looks, as it reminds me of the miracle that is at the heart of Christmas. Thank you so much for stopping by today, as the festive season draws ever closer and Thank You, Linda for all the inspiration your twelve tags are giving.
Monday, 9 December 2013
Funkie Junkie 12 Tags - Tag number 5, Saint Nicholas.
Hello, visitors to Magpieheaven and welcome! It's been such a beautiful sunny Advent day and I've managed another tag towards the 12 Tags of Christmas Funkie Junkie Challenge - yippee! As I used exclusively Artistic Outpost Snowy Woods stamps on this tag, I should also like to enter this for the Artistic Outpost December Anything Goes Referrral Here. Please click HERE if you would like to find out about Linda Coughlin's challenge. You have until December 22 to create 12 tags inspired by her wonderful designs. The Funkie Junkie Boutique, which offers lots of crafting goodies can be found here. This is the tag that inspired my make this evening. It is Linda's fifth tag and my fourth, as I'm not completing the tags in any particular order. My inspiration for this tag was Linda's beautiful Santa image and the warm, vintage tones on the tag. I am using the Tim Holtz tag die and cutting my tags from card myself, so I have to be careful not to attempt to crowd too much onto these fairly small tags. I tried to get around this this time by creating two tags in one! I'll show you what I mean.
I cut two tags, one plan and the other with the Tim Holtz Movers and Shapers snowflakes cut out of it. I then ran this one through an embossing folder after which I sponged it with Vintage Photo and Evergreen Bough and applied a little Green Amber and Spanish Topaz Treasure Gold. I spritzed the plain tag and swiped it through Festive Berries Distress Ink sprinkled with Perfect Pearls Gold powder. I had some seam binding scrunched up and stamped with Festive Berries and Vintage Photo and some tea-dyed lace.
I attached both tags together with a pine-cone brad and some seam-binding after embossing the Festive Berries tag with the fir bough stamp from Artistic Outpost 'Snowy Woods', stamped with Wendy Vecchi Fern Green Archival and then clear embossed. I stamped and clear-embossed the wreath from Snowy Woods, but it is only just visible under the little punched out leaves, which I painted with Paper Artsy Hey Pesto, a stroke of Glossy Accents and some Dry Distress Glitter and little red pearls.
Linda had a large Santa in the centre of her tag, but as my tag is smaller than hers this would have taken up the whole tag, so I used the book plate from the TH die as a frame and decided to create a little miniature of Saint Nicholas. I added some Hey Pesto Fresco to some Grunge Paste and squeezed this through a swirly Crafters' Workshop stencil before painting the whole frame with Hey Pesto and applying Green Amber Treasure Gold when the GP was dry.. I used just a small section of the image from Snowy Woods and it is exactly as I imagine the original Saint Nicholas to have looked. I stamped with Potting Soil, Wendy Vecchi Archival onto some card painted with a blend of Nougat and Cinnamon Frescos. There are so many amazing stories about the kindly Saint, how he resurrected three boys killed by a wicked butcher who stored them ready to make into pies and the poor man whose daughters had no dowries and would have had to make their living as 'ladies of the night' had Saint Nicholas not lobbed three bags of gold coins through their window, keeping his identity a secret. Is this the reason for those gold corn choccies we get in our stockings?
Here is one view of my Saint Nicholas tag. I added some punched out lace with text from the story of the Saint on it over the tea-dyed lace.
The tag can be moved to display the evergreens beneath.
If you get them in the right position, you can see the red gems at the centre of the snowflakes. As always, if you would like more detail, please click on the images. Thank you Funkie Junkie for creating such an inspiring challenge. I should like to enter this tag for Linda's Tag #5 and many thanks and Advent Wishes to my kind and creative Visitors and Followers.
Bah Humbug!!
Hello and welcome to Magpieheaven! Over at Country View Crafts they have a great challenge by the name of 'Bah Humbug' - click Here for details, while at The Artistic Stamper the challenge is 'Anything Goes'. Both challenges have some fabulous vintage inspiration for December makes! Well, wasn't 'Bah - humbug!' Scrooge's favourite phrase? When I was twelve I had the part of 'Little Fan', Scrooge's younger sister in a school production of Charles Dickens' 'Christmas Carol'. I grew to love the book, even though my character dies early - typical Dickens to have ailing female characters who die young!!! It has continued to mean Christmas to me. I decided to go with a vintage look for this card and to use an image that suggested to me the wonderful, jovial Ghost of Christmas Present who takes Scrooge on a magical tour to show him how those around him are rejoicing in the spirit of Christmas.
I began by sponging and spritzing a card blank with some Vintage Photo, Evergreen Bough and Broken China. I then stencilled over with some Snowflake Fresco paint through a Crafters' Workshop honeycomb stencil, dabbing some thin wisps of the Snowflake in places.
I then added this image from Bo Bunny's Silver and Gold paper collection. The snowflakes are punched from some Crackle Glazed card - Fresco Antarctic over Baltic Blue. I distressed the edge of the paper with Vintage Photo and Evergreen Bough and turned down the corners to reveal the lovely holly design, as it's double-sided paper. I just had to add a little Treasure Gold, Green Amber too.
Then to add my 'Ghost of Christmas Present'. He was stamped onto a die-cut oval, painted with Fresco Nougat edged with Frayed Burlap distress ink. I used Wendy Vecchi Potting Soil Archival ink for the image and just stamped on the edges with the fir bough from Artistic Outpost, Snowy Woods. The Saint Nicholas or Spirit of Christmas Present is from the same plate. I used Wendy Vecchi, Fern Green Archival to stamp my fir boughs in the corners.
I had lots of fun creating the background for my tag, swiping and spritzing and flicking with Vintage Photo, Frayed Burlap and Evergreen Bough and sprinkling with gold Perfect Pearls powder. I stamped the script from Paper Artsy mini 26 in Versamark and embossed with Stampendous fine, copper embossing powder.
The tiny leaves are punched out of card painted with Fresco Hey Pesto and frosted with dry distress glitter.
A pine cone brad and some Festive Berries dyed seam-binding providing finishing touches. As always just click on the images if you would like to see how the background textures look in more detail.
The stencilled snowflakes are sponged with Evergreen Bough through the card left when I punched out the Crackle Glaze snowflakes..
The text on the paper originally said 'Winter Wonderland', but I liked what was left behind when I guillotined it without thinking - Winter Wonder!
Here is my finished card, which I would like to enter for the 'Bah Humbug' Challenge at Country View Crafts and also The Artistic Stamper Anything Goes Challenge. Thank you so much for stopping by to take a peek at my Ghost of Christmas Present at this very busy time of year!
Sunday, 8 December 2013
Tag #1 of the Funkie Junkie 12 Tags of Christmas - Midnight Mass
Welcome to Magpieheaven where I'm slowly making my way through Linda Couglin's wonderfully inspiring '12 Tags of Christmas'. This is an amazing challenge offered by the Funkie Junkie boutique, which also supplies all kinds of great craft materials. There's still time to enter: you have until December 22 and the opportunity to win a great prize, so click HERE for all the information you need. For this tag, I was inspired by Linda's Tag 1, which you can see if you click HERE. This is my third tag, as I'm not working to any particular order. When I first saw Linda's I thought I would never be able to create a tag like that! I loved the effect she created with her stunning contrasts of black and white and the chalkboard technique, but I'm not a black and white person at all. I then turned to my Fresco paints and sought out the darkest blue I have: Baltic Blue. I've not used it very much, as I realized I tend to shy away from very dark colours. However, once I'd covered my tag with a nice smooth coating of this deep, midnight blue I was happy!
I wish I could have photographed the plain, dark blue tag, but the camera was in use by daughter again, so little peeks of the finished tag will have to do. Anyway, what I thought immediately was - Midnight Mass! I remember when I moved to a country town from London as a young girl, I started to attend a Church School and it was there I first heard about this special service held the night before Christmas. I still recall the magical feeling of coming home from the service after midnight with my new school friends, our footsteps ringing in the quiet streets; a scattering of stars and the moon glittering on the frost. Linda's amazing tag was entirely white and black except for a little 'pop' of red, which looked great. I decided, though to stick with my blue and white combo, as this best tied in with my Midnight Mass theme. I am always tempted to play with blending and adding colours, but this time I kept my Baltic Blue as a straightforward, solid background. I did add a scattering of white embossing powder to suggest snow or maybe a myriad stars in the wintry night sky.
I added the book-plate from the tag die, Crackle glazed, Snowflake over Baltic Blue and added two little diamond studs. The Christmas message is from Artistic Outpost's Snowy Woods plate. I embossed the snowflakes from Snowy Woods, using Versamark and Wow, white embossing powder. I also dug out my Tim Holtz die of little houses. I love this die and I have used it in lots of different ways since I bought it. I painted my card die-cut with Fresco Snowflake and added Shabby Blue Frantage. The snowflakes standing out in this image are punched from card or die-cut from a Movers and Shapers die and covered with melted white embossing powder.
I am working with Tim Holtz die-cut tags, which are not 'jumbo' sized so I have to think carefully about not crowding too much onto them. For this reason I have been playing with the idea of adding borders to the tags. On this one I added the swirly 'On the Edge' TH die, which I painted with Snowflake and edged with Shabby Blue Frantage. The paper lace is punched from a Christmas Book, explaining the origins of the Midnight Mass and I gave it a thin coat of Snowflake.
A piece of seam-binding dyed with Broken China distress ink and my third tag, Tag #1 - if that's not too confusing - was finished! I am entering it for the Funkie Junkie 12 Tags of Christmas Challenge. Thank you so much for stopping by today, as I know how the Christmas frenzy is taking hold at this point! Good luck with all you are creating and planning!
Friday, 6 December 2013
Funkie Junkie 12 Tags Number 2 - Brother and Sister
Hello there! Well Christmas is drawing ever nearer and I'm doing my best to complete the twelve tags of Christmas inspired by the very talented Linda Coughlin at The Funkie Junkie Boutique! Please Click Here for details of the shop and Here for the Challenge and rules! It's a great way to gain inspiration for Christmas makes from Linda's lovely designs and there's still a chance to win a prize: you have until December 22nd, midnight, eastern time so do pop over and give it a look.
The tag I'd like to enter today is Number 2. Here is Linda's original. I'm so behind I'm not doing the tags in any order. I'm going with the ones that give me immediate inspiration. They're all so lovely I'm sure they all will in time! What I loved about Linda's tag was the beautiful golden deer. I loved it so much I bought the Tim Holtz die. Now I can't give you step by steps this time, I'm afraid, as my daughter had the camera all day to do a photo-shoot for college, but here is my deer and I will take the tag detail by detail and explore how I did it and what it means to me.
As soon as I saw Linda's tag, I was reminded of a fairy story I read to my children called 'Brother and Sister'. In it a pair of children of royal birth are abandoned in the woods by their wicked step-mother. They stop to drink by a brook, which sings to them, warning them that if they drink of it they will be turned into wild beasts. They resist for a while, but eventually the boy drinks and is turned into a deer. His sister protects him until he is wounded by a prince hunting in the forest. Well, I expect you can guess how it all ends! Once again it is about the loyalty of a young girl just like Gerda in 'The Snow Queen' so females don't get an entirely bad press in fairy tales! I covered my die-cut deer in Versamark and then applied several coats of gold embossing powder. When they were melted I stamped with Music Stamp from the Paper Artsy Sarah Nauman, 007 Eclectica plate, making sure I covered it in Versamark first. Because the deer in the story is a prince in disguise I gave him a crown from some Dresden gold foil cut to size and a little gauze scarf with a green gem at the throat.
I used a colour combo a bit out of my comfort zone in this one! I broke open the Frayed Burlap, which I don't often use! I swiped my tag, made from card and a Tim Holtz tag die, through Frayed Burlap Distress ink sprinkled with gold Perfect Pearls powder and spritzed with water, repeating the process until I had a look I liked. I don't have the AO Midwinter stamps that Linda used, which were perfect for her composition, so after drying with my heat gun, I stencilled the trees from my favourite Clear Snaps stencil in Paper Artsy Fresco, Nougat. I was pleased with the snowy, misty effect and the way the trees glimmered through in gold and frayed burlap.
I added a pediment die to the top and bottom of the tag and edged with Wendy Vecchi Potting Soil Archival ink. I added to the snowy effect with lots of dobs of Gesso, including on the gauze. In this photo you can see the Champagne Crushed Glass Glitter in the left corner. I didn't have any of the beautiful cheesecloth or Tim Holtz linen ribbon that Linda used so I substituted some gauze, which I dyed with Festive Berries Distress Ink and some copper Perfect Pearls. I painted the hemp thread with some Gesso too. It is difficult to see in the photos how the trees shimmer with gold and how the Shabby Rose Frantage glitters on the musical snowflakes!
I used the sentiment from the Artistic Outpost, Snowy Woods plate stamped with Potting Soil and clear embossed. The little snowflakes were stamped from an X-cut snowflake stamp and painted with Nougat before being stamped with the music from Eclectica.
Here is the finished tag. I attached my deer with little foam pads. They were slightly visible so I melted some Frantage around them and - hey presto - vanished! Thank you, Linda for your inspiration and thanks to my visitors and followers so much for stopping by and looking at another of my twelve tags with a Christmas story behind it! I have another one ready for tomorrow, so I would really appreciate it if you could drop by - I understand how pushed for time everyone must be, though, as the Festive Season gathers momentum.
Wednesday, 4 December 2013
A Winter's Tale - Inspired by Alison
Well, Magpieheaven visitors, I really hope you are not feeling overwhelmed by Christmas preparations. I am determined not to be anxious about a season that is supposed to promote peace and good will! Today I had to visit the Dentist, but I tried not to think about it too much and to spend some time playing before my visit: I should probably have been Christmas shopping, but craft won, I'm afraid. Over at Paper Artsy Alison Bomber has been at her most inspirational! She is a phenomenal artist. Not only does she create amazing work, she is also so generous and honest about sharing the process with her readers. We are included one hundred percent as Alison confides in us about not only her triumphs, but also those bold enterprises that threaten not to go quite to plan, but turn out all the better for that! If Alison's baubles were bothersome, she lets you know that they were and we all gasp in awe at the wonderful outcome!
I so wanted to play along with Alison this time, not just because I admire her work, which I do, but also because her projects look such fun! Alas I don't possess very many of the wonderful products Alison used this semester! I have no liquid leaf; no triptych to decorate and no baubles or Rock Candy Crackle! I wasn't giving up that easily! I may not have baubles to decorate, but I am trying to create a tag tree in my favourite vase. My plan is to photograph my Winter Wonderland mantel-piece when it is all complete. Each of my tags is going to be about an aspect of what Christmas means to me. Trying to keep in the spirit of Alison's intrepid experimentation I attacked a tag and some card first with Fresco paints and then with Distress Stains: Antarctic and Inky Pool and Faded Jeans, Peeled Paint, Evergreen Bough and Picket Fence. I wanted to create patterns with drips, not in the more impasto style of Alison's gilded icon, but in a water-colour way. I was beginning to think baroque skies on ceilings stretching way above our heads, although I feared ending up with a grey and slushy day in Bromley Town Centre. Would those drips look better with some stamping?
I was thinking that I might enter my tags for the Funkie Junkie 12 Tags Challenge so this will also be my first one! I am actually starting with Week 8 and Linda's lovely blue, snowflake background is what inspired me. I do hope I have time to complete all 12 before the 22nd - eek! Here is a link to the Funkie Junkie Boutique where some of the beautiful supplies to make tags and so on can be found. I played with clear embossing some snowflakes from the Artistic Outpost plate and also using WOW white embossing powder on some others. I don't have the extra thick clear embossing powder that Alison used on her baubles, but I should so like to play with some of that! I swiped my tag through some Perfect Pearls powder to create a shimmer and - in the absence of the fine crackles of Rock Candy - I substituted a silver skeleton leaf, which looks like fine broken lines in the ice or frost fronds.
I liked the marbled look of my backgrounds and the way they shimmered, but I wasn't sure where I was headed exactly and the clock was ticking on towards the horrors of the Dentist! I wanted to use a Lynne Perrella Paper Artsy Christmas image rather than a traditional Santa and that's when the idea of 'A Winter's Tale' started to occur to me.
I think it was the texture of that leaf that did it! I started to think of a wonderful production of 'A Winter's Tale' - almost the first Shakespeare I ever saw - that my friend Nina's mum took us both to see when we were sixteen. It starred Judi Dench as Hermione and the directer was Peter Brook. At the poignant moment when Hermione's statue comes to life the audience all just gasped as Judi Dench stepped out from a giant pillar of ice, a warm, living woman and not a statue at all. Those memories of the magic of theatre and transformation kept informing what I was doing as I played around with my tag, hoping that a puddly mess would turn into something glittering and festive courtesy of Perfect Pearls and Tim Holtz Dry distress glitter!
I used my marbly card to stamp an image on from LPC0017. I used this image the other day and I am growing to love its versatility. On this project it reminded me of a ceiling painting that a fairy-tale couple such as Hermione and Leontes might have in their palace. I used Wendy Vecchi Cornflower Blue, inspired by Alison and Linda's blue palettes. Like Alison, I tried France Papillon's technique of creating Grunge Paste embellies. These I frosted with Dry Distress glitter and stuck on very carefully! I made about six, but they were probably too thin. These two were the only ones that slipped off my craft paper satisfyingly all in one piece: they reminded me of icing sugar! The snowflakes I had punched out of card I coloured with Frescos in Antarctic and Inky Pool, Nougat and Cinnamon and Shabby Blue Frantage. I wound stained seam binding, lace and singed grey gauze around my tag fastening and added some cream hemp thread. I bordered with Crackle Glazed icicles and a Crackle Glaze frame in French Roast with a coat of Antarctic over the Glaze. I also used brown paper lace with text an musical notes on it.
I wanted my tag to evoke the wintry mood in the first section of Shakespeare's play, where Hermione's little boy settles down to tell a story with the words, 'A sad tale's best for winter.'
Here is my seam binding, lace and gauze and a Prima brad, which I coloured with Treasure Gold White Fire to co-ordinate more with the winter colours of the tag.
Thank you for looking at my tag today: I do hope I shall be able to complete 12. Thank you Alison too for inspiring me to create something blue, shimmery, dangling and frosty with the supplies that I have, even if it wasn't baubles. I should like to enter this tag for The Funkie Junkie 12 Tags of Christmas and I'm starting by linking to Tag#8 and
Subscribe to:
Posts (Atom)