Wednesday, 7 May 2014

Dreaming with the Dragons - Gold and the letter Q

Hello and Welcome to Magpieheaven. I know we Dragons always say this, but I can't believe it's time for the Dragons Dream TIO again! And it's my turn to choose the recipe too, which I'm really excited about! I do hope you will be able to pop over to the Dragons Dream and see what my 'teamies' have created and that you will feel able to join in too. Remember all you need on your tag is to include the letter 'Q' some gorgeous gold of some kind and at least one stamped image. I chose a jumbo tag - I need some more of these now - and I came up with this Renaissance themed fantasy. I expect you've guessed that my 'Q' stands for Quill and that my focal stamped image appears to be on a unravelling scroll!
I wanted to have lots of fun with texture on this one and try to create something sumptuous, so here are some steps along the way.
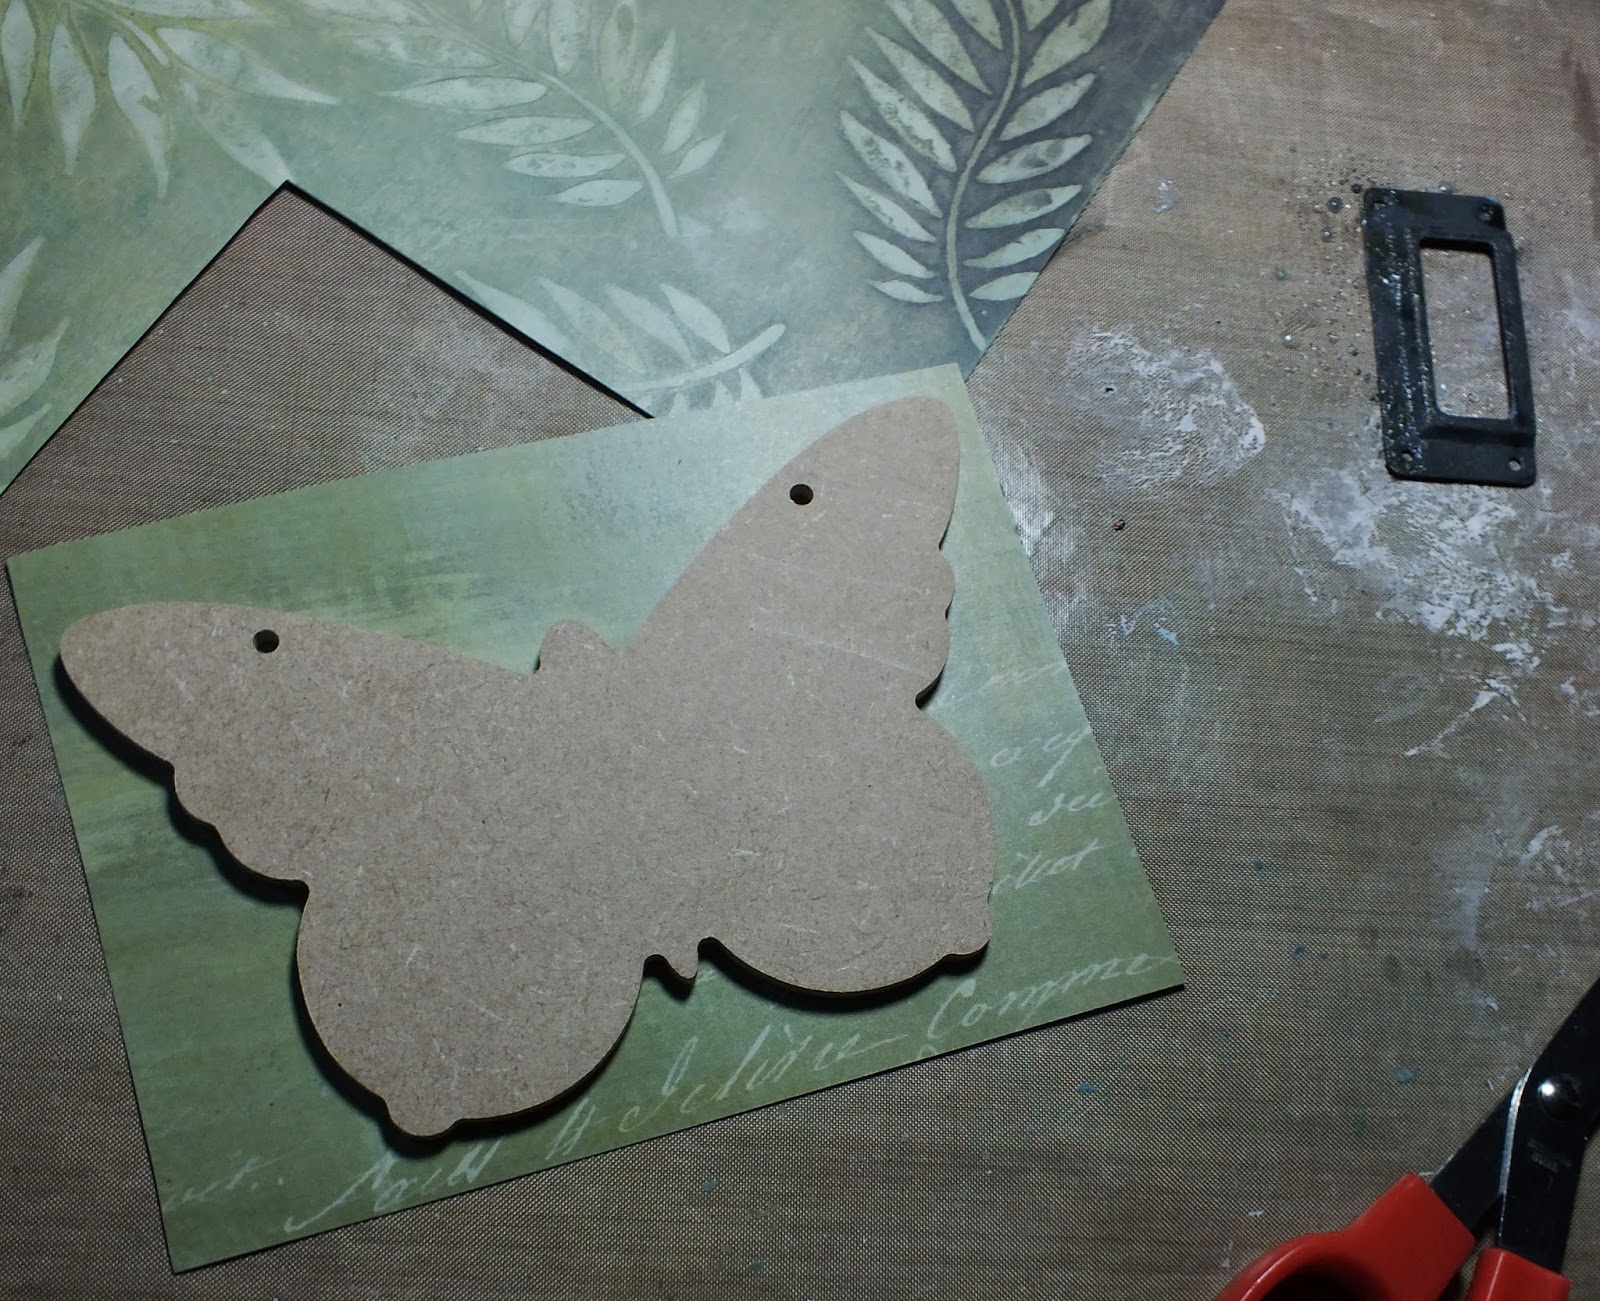
I painted my jumbo tag with Honeydew, a Fresco Opaque.
After spreading a thin layer of Grunge Paste over my tag, I pressed down some gauze from my stash into it.
When this was nice and dry, I went over it with some Brown Shed Fresco, which is a translucent.

 This is when I really got too involved to take any more photos! I stenciled through a Prima flourish stencil with Wendy Vecchi gold embossing paste and I applied lots of Frantage and Gold UTEE! I made the quill from a Lynne Perrella stamp of a nib, which I tipped in gold UTEE  and the feather is book text, gessoed, spattered with gold UTEE and sculpted onto wire. The hand gripping it is a PaperArtsy mini.
Here you can see the stenciling and a rose created from two different PaperArtsy flower dies. I stamped the Lynne Perrella lady on to card painted first with Stone Fresco, heat set her, and painted the detail with washes of Fresco. There is a bit of a shine on the photo, as I applied a couple of coats of clear UTEE to the image. The little resin bird has been painted and then Treasure Gold in Rose Quartz was applied. I also used Rose Quartz on the under-side of the rose petals.
For my letter, I used the 'triple embossing' technique. I applied Versamark to the tag and then layers of UTEE and Copper Frantage. I heated from under the tag with my heat tool, after each layer was applied until there was a moulten puddle! Then I covered my 'Q' with Archival Ink and pressed it into the melted UTEE. On the top left are some bronzed fragments, which I pressed into Claudine Helmuth's Multi-Medium. My tag reminds me of the Wedding Chests given to newly weds as gifts in Renaissance Italy as they began their new life together. Some of the beautiful paintings in the National Gallery are actually panels from these richly decorated chests, which often showed mythological or allegorical scenes featuring Venus and Cupid - of course! Perhaps my lady, seated at her arched window has sent out this little golden bird with a message of love and loyalty to her fiance? Have a lovely, creative Wednesday and don't forget to try and join in with the Dragons Dream TIO this fortnight.

Tuesday, 6 May 2014

Birthday Cards

Hello and welcome to Magpieheaven, where I've been making birthday cards for a couple of friends. I won't give their names just in case they see this blog and the surprise is spoiled! I often read on other blogs that crafters begin by making cards before they spread their wings and take flight into a world of canvases, altering and home decor pieces. That's definitely my history too! Before discovering the thrill of making exploding boxes back in April 2013, I made cards from time to time. I never thought too much about how I put them together or what techniques I might use on them. Now I find that confronted with a sheet of white A4 card I often feel uninspired or downright bewildered as to how I'm going to create something special - especially if it's going to have to fit into an envelope. With these cards I had a plan! I decided to play some more with the idea of creating a Master-board. Trisha's idea for Mail Art (see here) could perhaps be adapted to a slightly larger project than ATCs and Moos! This is what I came up with! I really hope they work and that the recipients will like them!
I had to work super-fast to get them done; as I'm late for both these birthdays - eek! There was no time to take step by step pictures. I have taken some detail shots to show you the effects in places, though.
Once again, I couldn't resist getting painty and only the tiniest areas of my original paper strips showed through! One of these days I'll have less coverage - well, I'll try to! This time I turned the Master-board so that instead of horizontal strips, I had vertical ones and I liked the 'Shabby Chic' look this gave - reminiscent of wooden panels. I had to use my new Tim Holtz trellis die! With those 'wood panels', I think this card looks a little bit like a flower growing through a trellis on a garden shed. My magpie brain is now planning all sorts of uses for these strips - maybe a canvas with paper strips and Grunge Paste to create the garden shed texture even more?
I used my trusty plastic lid to encircle areas of stencilling. The Peterloo flower was painted with Frescos in Lake Wanaka, Mermaid and Inky Pool and accented with a little Sapphire Treasure Gold. The sentiment is from Lin Brown's Eclectica flower sentiments for PaperArtsy.
I had enough Master-board left to create a second card. I wanted to see if I could create a completely different effect with this one. I think we go indoors with this one and step inside the little cottage, leaving the shed and the garden to enjoy a nice cool glass of lemonade.  As you can see I used lots of bits and bobs of lace from my stash. The bottles are from a Hot Picks plate and a Lynne Perrella one and I stamped them onto painted white wrapping tissue using first Cornflower Blue, Wendy Vecchi Archival Ink then over stamping with Potting Soil to give depth on the one in the foreground. The resin rose peeping over the Lynne Perrella lady's shoulder was painted with Lake Wanaka.
I stamped this Hot Picks iris straight onto the Master-board and coloured it with Fresco washes in Yellow Submarine and Hey Pesto to give a water-colour effect. The butterflies on both cards are die-cut from waxy paper and they have cocktail stick bodies.
As I stamped the Lynne Perrella lady onto card several times in order to 'stack up' the image and give it dimension, I pondered over the details in the image. This pretty lady is a mysterious character with her rather Steam-punk clock-hat and her elegant military jacket with its epaulettes. I could imagine her as a china ornament bought in the 'Swinging Sixties' when I loved to wander along the Kings Road in Chelsea, looking at the little curio shops. My girlhood dream was to open an antique shop with my best friend Sue! I even saved my pocket money and bought a tea caddy with a union jack and a picture of Lord Kitchener on it! What happened to it I don't know, but I've never lost that love of collecting curiosities! Well, thank you for looking at my cards today. I do hope my friends like them!

Saturday, 3 May 2014

Fabric Frenzy!

Hello and Welcome to Magpieheaven! Just a short post today and a sneak peek of a project I have over at Unruly Paper Arts, where the theme is 'Fabric Frenzy'. Do take a look at what the columnists have in store this month and learn about the many ways fabric can become an exciting part of a crafty project.
If you would like to find out what this is and how I made it, then just pop across to UPA here. I'd really appreciate it if you paid a visit and left me a comment. Have a lovely weekend, Julie Ann x.

Thursday, 1 May 2014

Wings to Fly!

Hello and welcome to Magpieheaven! Over on the PA blog, PaperArtsy fans have been showing how talented they are and creating some amazing projects for the #3up Challenge here. Each night three volunteers are selected to work with beautiful, new PaperArtsy products. Please pop across because the standard has been very, very high: you will not be disappointed! I've loved the artists' work with all the new products, but the other day my good friend, Lucy gave me the gift of some of the new Chatsworth papers. They are fabulous to work with, so if you're not sure what to give a crafty friend you couldn't go far wrong with these. Because I've been a GD this semester, I've not joined in the PA challenges lately, so I really wanted to get involved again and I decided to create something using Chatsworth! It's nothing like Gail's Origami style 'make', but she did inspire the theme of flight and I did use PA paper as part of it! Here it is - my Shabby Chic butterfly!
My colour scheme is partly inspired by Gail and partly by that of my kitchen. Ah, don't get me started on that one! Last June a friend who fits kitchens started to work on ours. Soon it will be a year, and we have three out of the planned sixteen cupboards; no work surfaces; a sink that desperately needs replacing; no tiling and walls that need plastering! Something has gone a bit wrong in our dear friend's life maybe or events just keep overtaking him; but he doesn't seem able to tell us about it! We soldier on with what we have, assurances - sometimes - that more will be done, and we can dream! I have now placed my butterfly over the door to the kitchen and it reminds me of how lovely it will all be when it's finished!
 On a previous blog I told how a demonstrator at Ally Pally taught us to use pretty papers on MDF shapes. I was eager to try this technique again and I had a pack of MDF butterfly shapes. I cut out some Chatsworth, stuck my butterfly face down, making sure my glue - matte multi-medium this time, although in the demo it was PVA - went to the very edge of the shape. I then gave the butterfly a wiggle to dispel air bubbles and trimmed around it roughly before sanding down the edges thoroughly, working in strong downward strokes.
I used some old sand-paper sheets from Mr Magpie's tool cupboard because I needed to be able to get into those fiddly little corners and make everything smooth. Chatsworth is so beautiful, it doesn't exactly need embellishment; but I did want - like Craftyfield - to see how it would look with stamping and Frescos applied.
The butterfly is edged with Hey Pesto Fresco Finish and I used some Sage, watered down in the centre and touches of Chartreuse here and there. I then used the LPC028 script stamp without a block and stamped randomly with Sage Fresco and Wendy Vecchi Potting Soil, Archival ink.
 I flipped the paper over and stamped this sentiment from Ink and the Dog Wings Plate 1 in Potting Soil, embossing it with clear EP. The metal plate is from a pack I bought from the MDF Man and rusted with rusting powder. I used tiny pearls at each corner.
The butterfly is to hang above the door so it can be seen on both sides. On this side I coloured the MDF with Guacamole, Sage, Chartreuse and Hey Pesto and did a little more stamping with LPC028. I again stamped my sentiment on the reverse side of the Chatsworth, but attached it to the centre of a half cotton reel that I bought from PA at Ally Pally - I love these! A little cream hemp cord keeps the butterfly in flight, hovering above our half-finished kitchen with a message of hope for the future! Well, our friend has informed us he is now working on the fourth cupboard door! I should like to enter my butterfly for the PaperArtsy challenge this week. Thank you so much for dropping by. And some day, when the kitchen is completed you're all invited over for tea and home-made cake! If you can't make it, I promise to post pictures on the blog!!! Have  a great weekend and - if you're playing along with the draw - good luck!

Tuesday, 29 April 2014

Stolen Glances

 Welcome to Magpieheaven.  Today the inspiration comes from my daughter who is studying Fashion styling and photography! For a recent project at college her theme was 'Stolen Glances' and I have explored this on a tag and ribbon 
  she is placing in a little treasure chest to evoke the mood of her 'Stolen Glances' shoot for her 'press kit'. In the shoot she wants to capture a sense of mystery and hint at  Alexandre Dumas' 'The Lady of the Camellias' - we're hoping our white camellia will last just long enough for her to use one of the blooms in the 'shoot'. Perhaps in a few weeks' time she might let me show the photos from the shoot here! Maybe then I'll be able to give away a little bit more of the story behind the 'shoot' and how it links with the novel!
 The ribbon is some wide silky trim from one of my old jackets, stamped with Tim Holtz's Tattered Alphabet in 'Potting Soil' archival ink by Wendy Vecchi. 
The Feather, also stamped with 'Potting Soil' is from PaperArtsy's  LPC007. Here you can see the other side of the tag, which also features that same feather.
The flower is created using two different PaperArtsy dies: the 'steam punk' and the regular flower. The petals are a combination of PaperArtsy Smoothy card and Tim Holtz canvas textured Core'dinations paper, painted with Nougat, Vintage Lace and just a touch of Butternut. Once again I used the lovely doily stencil by Rebekah Meir from Crafters' Workshop - I so love this and I'm really glad I gave into temptation and bought it at Ally Pally. The script is from LPC028, stamped without a block to create an impression of age. I edged the tag with some Chocolate Pudding and French Roast.
For the flip side of the tag I used some Rose Quartz Treasure Gold on the underside of these PaperArtsy leaves and a beautiful leaf charm, a gift from my crafty friend, Lucy who I met up with yesterday. I gave it a thin coat of Nougat and a touch of Rose Quartz Treasure Gold to tone in with the rest of the tag. Here it is, a simple tag and ribbon combination. Thank you so much for dropping by and taking a look in the Magpie's Nest. I always value your visits. Have a lovely evening and a great week.

Thursday, 24 April 2014

Our Creative Corner - With a Song in your Heart.

Hello from Magpieheaven, where today I've a song in my heart! When I saw Alison's Challenge over at 'Our Creative Corner' , I had to join in! My problem - apart from time, of course - was choosing one song as my inspiration! Finally I opted for Stephen Sondheim's touching 'Send in the Clowns' from the musical, A Little Night Music. Sondheim, I think, has reached lyrical perfection with this incredible little song. I sang it all the time I was crafting, cleaning, cooking, going around the supermarket - I just managed not to while I was tutoring! I expect I am now known locally as 'that mad lady who sings about clowns!' Clowns scared me as a child, but discovering Pierrot and Harlequin as a teenager sparked a fascination and it's these theatrical, rather romantic clowns I imagine as I listen to this song! I heard so many versions on YouTube, but ultimately  I found Barbra Steisand's the most moving.What do you think? This is a link to the lyrics and Judi Dench's version  http://artists.letssingit.com/stephen-sondheim-lyrics-send-in-the-clowns-ms8d5sh. And these are the lyrics from it that I included on my project...
Sondheim uses a series of simple questions to convey a heart-breaking situation. Desiree, a beautiful actress once had an affair with Fredrik. Years later she meets him again and he is in an unconsummated relationship with a young woman. Desiree proposes to him, but he rejects her offer, too in love with his young wife to leave her. The song is a blend of regret, anger and love. Desiree's wounded pride and disappointment are conveyed through the simplest of words and within quite a limited musical range: the result is just divine. Here is what I made inspired by this song.
My intention was to make a diptych, with a purpose that I will reveal later. I took two thin canvases from 'The Works.' I painted them with a couple of coats of 'Little Black Dress', PaperArtsy Fresco Finish paint and then some Crackle Glaze. While this was drying, I made my own Washi tape with masking tape, painted and stencilled then stamped with Ink and the Dog Mini 30.
I painted over my crackled boards with PaperArtsy Mermaid Fresco, used some Grunge Paste coloured with a little Spanish Mulberry through a Crafters Workshop Harlequin stencil and stamped in Wendy Vecchi Potting Soil Archival, again using the PaperArtsy Ink and the Dog Mini 30. The masking tape was then used to attach the canvasses so that they looked like the covers of a book.
Now it was time for some fun adding clownish elements. This was my initial layout, but I always spend lots of time arranging the pieces before I finally come up with a composition I like. For Fredrik and Desiree I used Lynne Perrella Collection 004 and 006 stamps by PaperArtsy. I die cut arched windows from linen, using a Tim Holtz die. I then painted these with layers of Fresco in Mermaid, Antarctic and Inky Pool edged with French Roast. Mixing the paint with some Fabric Medium really helped it to flow smoothly and enabled me to get some shaded effects. The Harlequin ribbon had been in my stash for a long time and I'd never quite known what to do with it. I love this bare tree ribbon and on this project I thought it could symbolize that it is now too late for Desiree and Fredrik: that old relationship will not bear fruit. The little hats are also painted on fabric and they come from LPC003.
As you can see, I finally changed my layout considerably and added some new elements including a tiny Shrink Plastic clown hat! The black and white seemed rather stark, so I stamped it with the medieval script from PaperArtsy Mini 26 in Potting Soil Archival ink. I changed the position of the Tim Holtz flower with the resin rose at its centre, accented in Treasure Gold in Sapphire and Florentine. The butterfly on the left is made from interfacing courtesy of Lesley Ebdon, painted and stamped and Frantaged! The sentiments on the theme of 'clowning' are from PaperArtsy Ink and the Dog stamped onto some beautiful tea-stained fabric all the way from my lovely Magpie Cousin, Dianne in Canada! I combined needlework with the other techniques on this project and here are some details - sorry for so many pictures!
I decided to leave Desiree with the hat she already had!
The fabric pieces in the top left-hand corner are the love-letters Fredrik might have written Desiree long ago! I used die-cut left-over baby wipes covered in Frantage for one layer of petals on the rose over to the right! I also over-stitched some gold mesh onto Desiree's gown.

Fredrik's hat had some wadding stitched under it to give dimension!
...And I almost forgot - a bunch of rusted keys, a lovely charm given me by my dear friend Lucy. Poor Desiree, just as she was ready to unlock the door to Fredrik, she found 'nobody there'. 
The diptych stands like an open book...
 and inside are Desiree's keepsakes and...
A home for Post-it notes that can stand on our dresser. The fairy Pierrette is one of Sandra Evertson's beautiful 'Petite Whimsy' stamps.
 An image transfer of a Picasso Harlequin from Altered Pages onto fabric; lots of stamped and painty layers and some Indian Mirror Work braid were added before the finishing touch - the lyrics!

Isn't it rich?
Are we a pair?
Me here at last on the ground,
You in mid-air.
Send in the clowns...


Isn't it rich?
Isn't it queer?
Losing my timing this late
In my career?
And where are the clowns?
Quick, send in the clowns.
Don't bother - they're here.


So if you're still around, waiting for them to send in the clowns, thank you so much for your patience in looking at all those pictures. I should like to enter my diptych for the 'With a Song in your Heart' Our Creative Corner Challenge. Have a great week, full of music and songs!

Wednesday, 23 April 2014

Dragons' Dream - A flower and the letter 'B'.

Hello Followers and Friends! I do hope that you had a wonderful Easter break and that if you don't celebrate Easter, you have been happy and enjoying some glorious Spring weather. I so appreciate the kindness of my followers in stopping by to take a look at my 'Magpie Makes' and I hope that you will find something of interest in the Magpie's Nest. Today it's time to dream with the Dragons again, and this week the amazing Gabrielle has set the recipe! She had so many ideas whirring around in her imagination, in the end she asked her son, Tom to decide and he came up with 'The letter 'b' and a flower'. Of course I was up and away with that recipe, so eager to play around with creating flowers that it wasn't until it was too late that I realized Tom's instruction had been 'A flower' - not a whole bunch of them! I do hope he and Gabrielle will forgive me for getting 'carried away' and featuring not one, but four flowers in all! Sadly Magpies are not renowned for arithmetic! If you want to see some great takes on this recipe by people who can read and count (!) then please click here. We love to see your beautiful tags so do link up with the Dragons' Dream too!
'B' is for blue - my favourite colour so I began by covering a Jumbo tag with some Ice Blue, Fresco Finish paint. I then went over with some Antarctic and some Mermaid, using my new Prima sanding tool that I bought at Ally Pally to rub off some of the top coat to reveal the different shades beneath. Next it was time to play with the gorgeous doily stencil by Rebekah Meier for the Crafters Workshop that I also bought from AP. I used Leandra at PaperArtsy's 'bumping' technique for this, sponging through the stencil first in Chocolate Pudding, then shifting it a little and sponging over with Mermaid.
After adding some text from a PaperArtsy mini in Wendy Vecchi Potting Soil archival, I gave it a good sand with my Prima tool for an aged look and edged it with Inky Pool and then French Roast. The Prima too also has an edge for distressing the sides of the tag.
As you can see, I played with all sorts of ideas for creating different layered flowers. I had to put aside some of my fantasy flowers for another project in the end. I also found a Tim Holtz medallion in my stash with the word, 'Breathe' engraved into it. My tag was beginning to have a message: flowers, birds and blue all symbolize part of what it is to breathe and to feel alive for me! Blue skies, the scent of flowers and the sound of birdsong combine to make my Magpieheaven!
 Eventually, after much shifting around of elements, I came up with this composition. The blue eye at the centre of the flower on the right was painted with some Glossy Accents over Beach Hut Fresco to give the effect of a bright blue eye! The eye is part of an 'Inkylicious' stamp of a face. Over on the left is the beautiful Lynne Perrella lady stamped with Wendy Vecchi, Potting Soil onto Shrink Plastic, painted with Antarctic Fresco. I just had to include her, as she seemed so perfectly to complement the circles on the doily stencil.
I used a Crop-o-dile to punch a hole through the plastic, threading a little blue waxed thread through to make her into a medallion too. The Tim Holtz disc was painted with Antarctic and touched with some Sapphire Treasure Gold.
This is my favourite in the flower garden: a brown gauze flower sent by my crafting friend, Kerry Ann Hickton; some Tim Holtz die-cut petals; a rusted Prima flower courtesy of Lucy another of my dear crafting friends and a little blue resin bird, covered in Sapphire and Indigo Treasure Gold. Thank you so much for dreaming with me today in my blue tag garden. I wish you all blue skies, blue flowers and birdsong in your own gardens this Springtime!