Sunday, 28 December 2014

A New Life for a Truffle Box!

Hello everyone! I do hope you had a wonderful Christmas with lots of craft goodies and packaging by the lorry-load to re-cycle!Tonight I'm sharing some space over at PaperArtsy with my friends, Gabrielle and Lucy. We're delighted to be tonight's #3Up-ers! If you haven't done so already, please do hop across and take a look at the fabulous projects Gabrielle and Lucy came up with, using their favourite materials and a very lovely Lynne Perrella stamp! We were each allowed to choose a favourite technique, but Lynne Perrella's LPC030 was our co-ordinating feature. I had a truffle box I had been saving from last Christmas and I wanted to use Shrink Plastic to give it a special makeover. This particular stamp was just perfect for decorating a circular box and adding interest in the detail.
I snipped off the little ribbon loop on top and coated the whole box with Gesso.
As you can see, I also painted inside the box with PaperArtsy Little Black Dress for contrast. The Gesso was quite rough in places, so I sanded it down, before applying my Frescos.
For a shabby-chic look, I painted the inner box with Little Black Dress and then a thin coat of PaperArtsy crackle glaze applied with a palette knife. When this was dry I over painted with thick strokes of Nougat. I then sponged the edges with some Chocolate Pudding and, for the final touch, I stamped some Hot Picks text in Wendy Vecchi Potting Soil Archival. I didn't use a block with the stamp and I just touched the surface in places with it to give an uneven, worn impression.

Now it was time to add some texture. I had given the lid a coat of Nougat Fresco and I added a few drops of Irish Cream to some Grunge Paste and pushed this through a stencil to create the lacy pattern on the lid. I used a couple of PA flower dies of different sizes to create the rose from good quality drawing paper, painted with Nougat, Irish Cream and a touch of Chocolate pudding. There's also some of that text from Hot Picks on there!
I liked the way my box was shaping up, but it needed something to give it a new history! Using the Lynne Perrella stamp, it was going to be transformed from a just one of many chocolate boxes on a production line to a little keepsake for storing special things.
Over on the PaperArtsy blog you can see how I painted the Shrink Plastic and die-cut it to create these miniature leaves, which I edged with a little Treasure Gold. The Guacamole was a nice 'pop' of colour, I thought.
Here is the final view of the project with the Lynne Perrella stamp in its entirety, stamped onto tissue painted with Nougat, with a little brayering of Snowflake here and there for highlight and fixed on with Satin Glaze. I like to think that it no longer looks like a truffle box from a very well known high street store; but a curio found hidden away in a cluttered old junk shop. I filled it with a selection of twines and ribbons for a special, crafty friend. I do hope you are all finding lots of inspiration from the #3UP projects and lots of time to play this holiday! Very Best Wishes everyone for a Happy and Creative New Year!

Monday, 22 December 2014

A Very Merry Christmas!

Hello and welcome to Magpieheaven. I just wanted to create a short blog post to wish my friends and followers a very Happy Christmas before things get truly hectic! For the last weeks I've been laid low by some kind of virus, but today I felt well enough to create one last card to hand deliver to an old friend...

It really had to be quick and simple! Luckily I had some master-board left over. I embossed a Lynne Perrella feather over this, after I had attached it to the Kraft card. I used Wow white embossing powder with a few flakes of chipped ice frantage added and then doodled around the edge with a white Signo pen.

 I had meant to do so much when this bug hit and I'm sure many of you have been in the same position, picking up colds and flu just when you need to be full of energy! Anyway, today I feel ready for anything and I would like to wish you a Happy Christmas; to thank those of you who sent me beautiful cards and to express my gratitude for the support you have given over 2014. Thank you too for the comments you leave and all your wonderful, inspiring blogs that stimulate and enthuse me. May you have a peaceful and joyful Christmas, close to the ones you love.

Monday, 15 December 2014

Speed Crafting!

Hello and welcome to Magpieheaven. Now something I've never been able to do is create a project really quickly! I've always marvelled at the lovely 'clean and simple' cards on fellow crafters' blogs; but somehow I've never been able to stop adding this or that detail, or creating yet another layer. Yesterday afternoon, though, panic struck! With all my cards finished and ready to post, I realized that I had no invitations for a little party we are giving for our neighbours! I had to work fast! In fact I had to work so fast I had no time to take step by step pictures of the cards. I also had to deliver them as soon as they were finished so apologies for the photos taken as I finished each one, in a rather dark corner with a daylight lamp! I will try to explain what I did and I hope you will like the new 'Clean and Simple' Magpie look that was rather 'forced' on me!
I had some Kraft card blanks left over, which I thought would go rather well with the simple look. Some I just left blank, but I gave others a strip of Tim Holtz, music note tissue tape down the side - I usually make my own, but no time today! For the background I just took a sheet of white card and painted it with a blend of PaperArtsy Frescos in Nougat and Stone. Then I brayered over with Antarctic and Snowflake. Next I took a large Stencilgirl stencil of Birds on branches and pounced over this with Hint of Mint and Guacamole. I added some script from my favourite gothic Mini stamp in Wendy Vecchi Cobalt Archival and wiped this with a baby-wipe almost immediately to create a faded look.


 Can you see what has become my favourite JOFY snowflake stamp there too - stamped in PaperArtsy Snowflake Fresco with a touch of lace from a Crafty Individuals lace background stamp? I took my trusty guillotine and just cut rectangles of all different sizes and then edged them with Evergreen Bough Tim Holtz Distress Ink. Finally I took some Chatsworth paper by PaperArtsy and stamped a Lynne Perrella medieval looking image all over it in the Cobalt Archival.
 This was then brutally and rapidly cut using Tim Holtz's leaves die. I coloured each leaf with a sponging of Evergreen Bough and then melted some Shabby Blue Frantage on the edges to suggest a frosty morning. These invitations took a couple of hours to produce. Now I know that's not exactly a speed challenge, but for a snail like me it's pretty good going!
 I do hope my guests will like them - and that my friends and followers will like Magpie's Speed Crafting! I hope you are all calm and super organized for Christmas! Have a great week. Warm Christmas wishes from a rather breathless Magpie!

Sunday, 14 December 2014

Christmas is Coming!

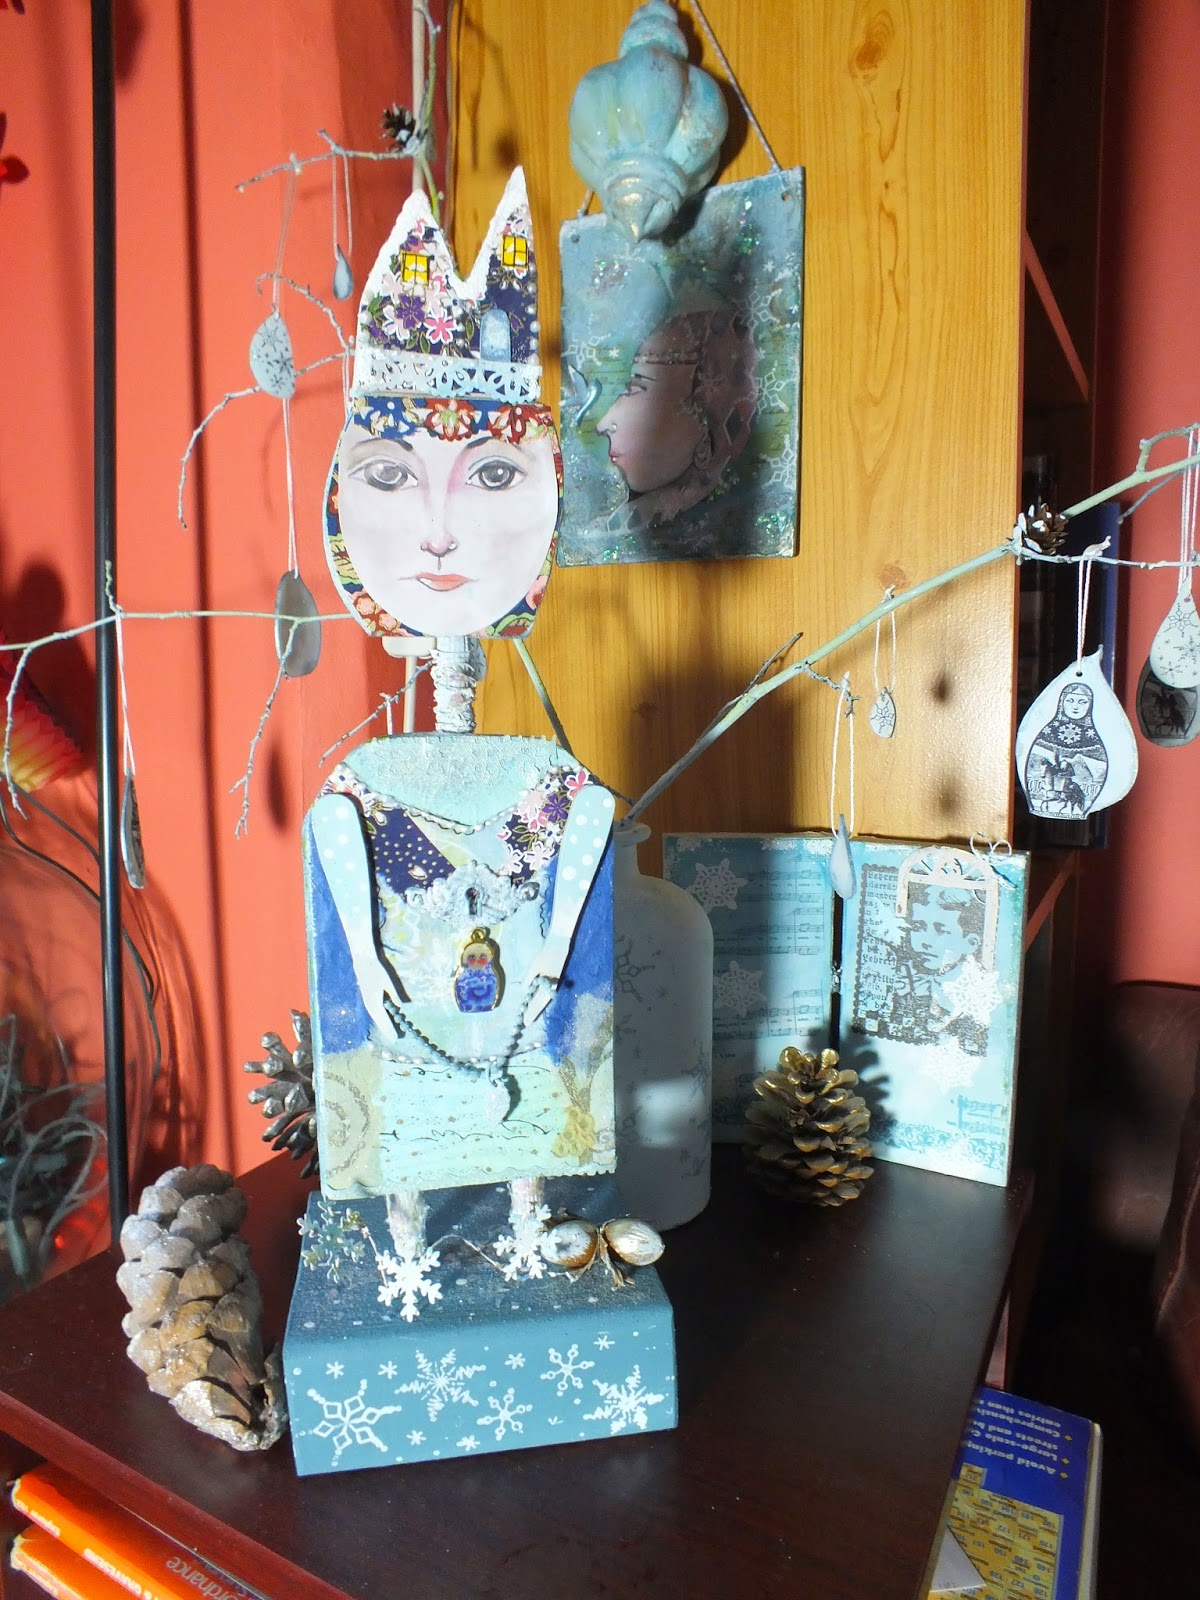
Hello and Welcome to Magpieheaven! How are your Christmas preparations going? We managed to get the Magpie tree up today - lots of little bird decorations - and my Russian fairy-tale corner is coming along!
 I was really pleased to find these little matryoshka houses from last year to add to my Russian theme!

 If you are super organized and you have time join in a challenge, over at Unruly Paper Arts the theme for December's RAQ is 'Fireworks'. You can see the details and the inspiration from the columnists here. I created a little ATC using a Tim Holtz window frame die and a Lynne Perrella image. Perhaps the lady is looking out onto a snowy New Year's Eve firework display and dreaming of what may be in store for her in the year to come.
My ATC could also be adapted as a Christmas card. I started with a rectangle cut from a master-board. I stamped the Lynne Perrella lady onto painted tissue and then fixed her onto the master-board with PaperArtsy Satin Glaze. The window frame is Crackle Glaze over PaperArtsy Little Black Dress with PaperArtsy Turquoise painted thickly over it. The white snowflakes are from a JOFY mini also from PaperArtsy, and I stamped them in Snowflake Fresco paint. I created the effect of fireworks by spattering on some yellow and red paint.
Here is the same basic idea attached to a Kraft card blank with a strip of my own washi tape. I tried Prima Crackle on this window frame and used some White Fire Treasure Gold. The sentiment is from Snowy Woods by Artistic Outpost.
This time it's still Lynne Perrella and the window idea, but a little town from the top of the tag on LP017 stamped onto tissue. You might have noticed that I removed the mullion from the die in a different place on each of these to create a slightly different effect against the master-board. Thank you so much for stopping by Magpieheaven at this very busy time of year. Don't forget if you want to play along with Unruly Paper Arts there is still time to join in and win a great prize - this month it's a year's subscription to a Stampington Magazine, so it's well worth creating some New Year Fireworks of your own.
I hope you all find time for moments of peace too amid all the hectic rush!

Tuesday, 9 December 2014

A Gift

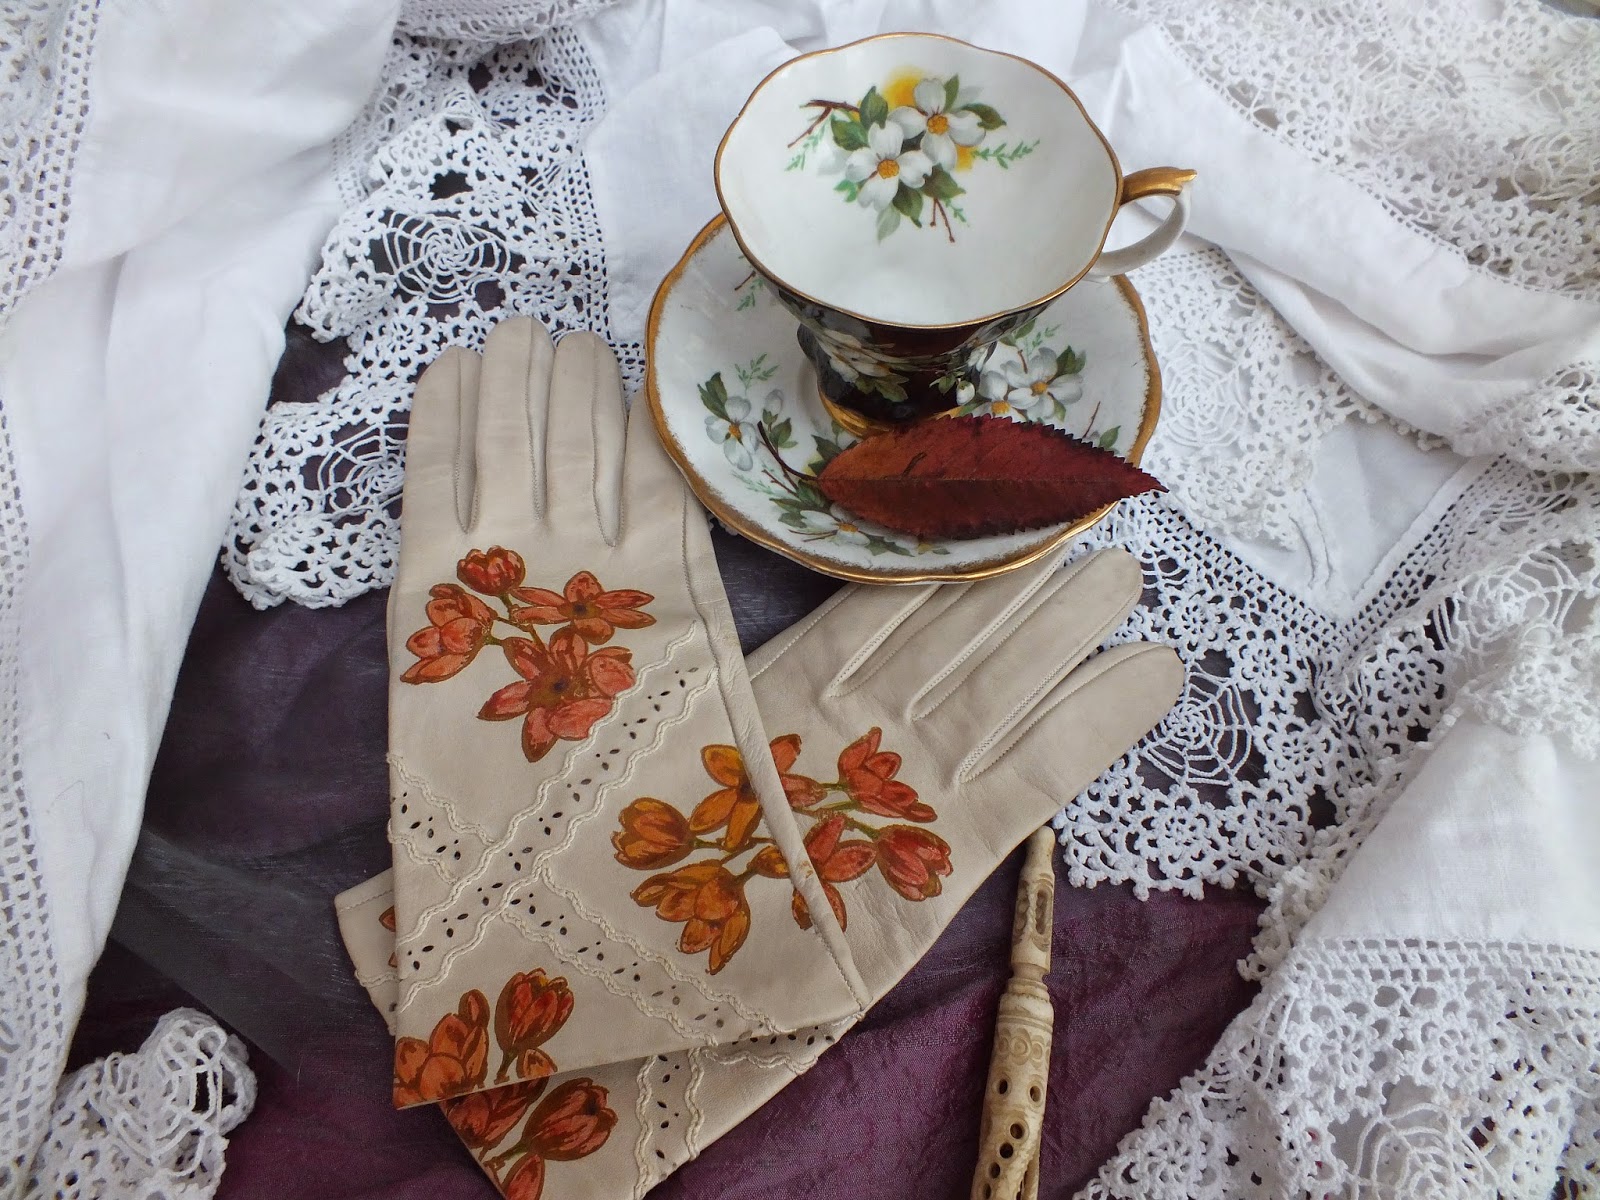
Hello and welcome to Magpieheaven on a crisp winter's day! I just wanted to share with you today a really beautiful gift from my dear, crafting friend, Lucy. You might remember that Liz Borer showed us some wonderful examples of stamping on leather over at the PaperArtsy blog here? Lucy, inspired by Liz, decorated these vintage leather gloves and to my amazement and delight, she has given them to me as a Christmas gift.
I think they are one of the loveliest and most special gifts I have ever received! Here they are pictured with one of my Grandma's special tea-cups; a vintage table-cloth that belonged to my mum's cousin and a little carved pen my oldest friend gave me for my twenty-first birthday. One end unscrews to reveal a little golden nib and the top has a little lens on which you can see a street map of Paris.
The stamping on the gloves is so beautifully done they look like a hand-painted heirloom. I am certainly going to treasure them and wear them on special occasions. When I met Lucy yesterday I had just discovered that my winter gloves had a hole in them, so I wore my precious new gloves home. As I sat there, surrounded by commuters, my gloves transported me to the 'Fin de Siecle' world of Oscar Wilde and I imagined Cecily wearing them with a rather fetching travelling dress, and murmuring to a companion, 'I never travel without my diaryOne should always have something sensational to read in the train.'
Thank you so much for stopping by Magpieheaven today. And thank you Lucy for such a perfect gift.

Sunday, 7 December 2014

A Ballet Russe Backdrop.

Hello and welcome to Magpieheaven, where I'm gradually decorating for Christmas. I like to have a theme to my decorations each year and this time it's Russian Fairy-tales. I've created a little canvas hanging to display above my Frost Maiden doll and my Matryoshka tree. She could perhaps have been inspired by one of the costumes from the Ballets Russe! The human face is a key component of my project so I'm linking it to 'That's Crafty's'  All About Face Challenge  here. I'm also linking up to the Unruly Paper Arts 12 Days of Christmas Party, where I've been having so much fun - you can find out about here.
When I was a little girl I was a huge ballet fan, obsessed with Ballet Russe star, Anna Pavlova, pictured here. Her high cheekbones and strong features have always seemed to me an ideal of beauty. That head-dress could have been taken straight from an icon! First things first, though.
To begin my theatrical backdrop, I took a mini canvas and punched two holes at the top to hang it by. I happened to have some Irish Cream Fresco Paint left over from another project so I slapped that on as a base coat.
Next I added some Grunge Paste through a Prima stencil. These flourishes were ultimately rather lost under all my layers, but you win some, you lose some when it comes to backgrounds!
I had a plan of what I wanted for my focal image. Rather than draw a completely new face, I went to one I had created for my Queen of Hearts Art Doll and scanned into the computer. She was originally designed for a wooden profile head, but she had the kind of strong features I felt I would be able to adapt for my project.
Using Pan Pastels, Inktense pencils and Pitt Artist Pens, I transformed her into a rather theatrical moon, which I cut out carefully and positioned on my canvas. I didn't stick her down until I had decorated that background, though.
First I gave parts of the canvas a generous coat of  Prima Crackle and left it  to dry for a day. I then painted it with Fresco Finish colours by PaperArtsy: Antarctic, Inky Pool and Hey Pesto.
To create the Ballet Russe magic, I used some Shaved Ice Frantage, fixed on with Glossy Accents. I added white Posca Pen  highlights and accented the eyes and lips with Glossy Accents too. Sapphire, Indigo, White Fire and Green Amber Treasure Gold also helped to create some more glitz, and I painted the face with Pearl Glaze to give it a moonlight sheen.
Jofy snowflakes stamped in Snowflake Fresco Finish by PaperArtsy and a little bird with snow-tipped wings - maybe the swallow from The Happy Prince - help create the feel of a tale told on a cold Russian winter's evening.
The diamonds on the head-dress were created with a harlequin stencil, edged with white Posca pen. I shall try to photograph the final tableau of decorations in a few days' time. For now, thank you for dropping by Magpieheaven today. I am having so much fun linking Christmas posts to the Unruly Paper Arts 12 Days of Christmas link-up here. Please do pop over if you can and join! 

Thursday, 4 December 2014

Merry Matryoshka Christmas!

Hello and Welcome to Magpieheaven! Tonight I'm lucky enough to be over at PaperArtsy's blog. Please do hop across if you have a minute! I'm sharing a simple Christmas make using an old bubble bath bottle and some twigs - with my favourite Shrink Plastic! I'm also linking this blog to the Unruly Paper Arts Party here
And also my favourite Lynne Perrella Collection Christmas Stamp Plate 016. The lovely matryoshka always reminds me of a Russian Christmas.
 I began by painting my glass bottle with PaperArtsy Fresco Paint in Antarctic and then stamping the beautiful JOFY snowflake stamp from PaperArtsy over it using Lake Wanaka Fresco.
I sprinkled with Tim Holtz glitter while the paint was still wet and added a little Guacamole Fresco in places. The twigs were also given a coat of the same colours and sprinkled with some glitter.

Next step was to lightly score a couple of sheets of Polyshrink, Shrink Plastic with a sanding block in cross-hatched strokes. I then painted them with a watered down application of Antarctic Fresco, stamping some with JOFY'S snowflakes and some with the Lynne Perrella image. As you can see from the picture, the best way to stamp on the plastic is to turn the paint side down onto the stamp and press in gentle circular strokes. You will see the image show through. You will also see that before this I drew 'tear drop' shapes on the SP with black pen and then cut them out.
Remember to punch a hole in your tear drops before you shrink them! I edged them with a little Glossy Accents and some more Tim Holtz glitter and a touch of Sapphire Treasure Gold. There is a blob of Pearlen Pen at the tip of the twine.
Some tiny glittering mini pine cones provide the finishing touch/
Here is my enchanted tree with the Frost Maiden! I shall be adding some more Russian fairy tale themed decorations over the coming days, I hope! Thank you so much for dropping by Magpieheaven today. I do hope you're on track with your festive preparations, and that the coming weeks will be filled with fun and happiness.

Wednesday, 3 December 2014

Magic and Holly!

Hello and welcome to Magpieheaven. December already, and at the Dragons' Dream TIO Challenge, we have come to the end of the alphabet! Our creative 'teamie' Jax has chosen holly for this challenge - very Christmassy - and the letter 'M'. If you pop over to the Dragons' Dream here, you can see some beautiful inspiration from the team. Why not create a Christmas-themed tag to attach to a very special present; to give to a friend or to add a festive touch to your collection? If you're going to link up to the TIO Challenge, just make sure that the letter 'M' features on your tag, that there is at least one stamped image and that you include some holly in your design. My tag features stamping, of course, but I also challenged myself to use some of my own artwork - more about that later! You might want to make yourself a hot chocolate or a glass of mulled wine; to sustain you through this long post! I'm also linking up today to the Unruly Paper Arts 12 days of Christmas Link up Party here! Please take a look at the inspirational Christmas projects and why not add a post yourself and leave some love for others?
 I decided to use my Prima Crackle Paste for a tag making session and, because I didn't want to waste anything, I found myself making 3 tags. I was also rather challenged by Jax' recipe; as I don't have any holly stamps or die-cuts! Searching through my stash, I found some pretty holly ribbon, a tiny scrap of Bo Bunny scrap-book paper from last year and a Lynne Perrella Paper Artsy Christmas sentiment stamp that did have a border of holly leaves at least!
 
I wanted to create a background of snow-flakes from Crackle, so I made myself a stencil from acetate, using a Tim Holtz tag and Snowflakes die-cuts. After pushing the paste through the snowflake cut-outs, I noticed that where it had clung to the acetate it was making frost-like patterns. I grabbed another Jumbo tag and pressed the reverse side of the acetate onto that. I sprinkled my snowflake tag with some tiny clear beads while the paste was still wet. Then, when everything was fully dry, I painted my tags with PaperArtsy frescos in Snowflake, Antarctic and Lake Wanaka with a little dry brushing in Inky Pool and Guacamole. 
I put aside the acetate snowflake cut-outs from my die-cut and then I took black card from some packaging and stamped Jofy (PaperArtsy) Snowflakes over it in Snowflake Fresco.
I lined my black card up behind the snow-flake apertures and used the rest to create holly leaves and as a background for my word tiles, for which I used Tim Holtz's Worn Alphabet with Wow white embossing powder. I added some Treasure Gold in White Fire to the tag, edged it with silvery flakes of Frantage and made tiny snow dots by dipping the end of a pencil in Snowflake Fresco. You might just spot that I used my Jofy stamp again on the jumbo tag!
Here is the finished acetate tag, which I fixed to a card backing. I decided that if this one was to be my Dragons' Dream inspiration, it would need more holly and turned to one of my jumbo tags.
 I thought I might use this tag for the Dragons' Dream inspiration. My 'M' word would be 'Merry' and the holly features in the border around the sentiment! I added some Grunge Paste flourishes with a little Pewter Fresco and Sapphire Treasure Gold to highlight the snowflakes. The central image is from a Lynne Perrella Christmas plate, stamped in Wendy Vecchi Cobalt Archival onto painted card and then clear embossed and finally coloured with Inktense water-colour.
Frantage in Shabby blue gave an extra snowy look to the tag! I liked it, but I felt that the Christmas roses outdid the holly! What next? I've recently started adding my own artwork to projects, inspired by the course on creating art dolls that I took with Mary Jane Chadbourne back in the summer. Could I incorporate one of my faces onto a tag?
These faces are not technically brilliant. They are created from my imagination. I sketch for fun, using Inktense pencils and a little water; scan them into the computer and then re-size them using Word, printing them out when I need them.
 Once I had fixed this young lady on with Matte Glaze, I was able to add finishing touches to her face and then give her a final coat of Glaze so that she blended into the tag. Here are the acetate snowflakes, fixed on with Glossy Accents and coloured on the back with some Alcohol Ink.
Here you can see some of the texture on the tag. I used a Crafty Individuals lace background stamp with Snowflake Fresco to create the impression of lace drifting out from under the fur trim of her holly embroidered cloak. Could she be little Girda from the 'Snow Queen' all decked out in the finery given her by the kindly Princess and off on the next stage of her journey to find her beloved little Kay? Thank you so much for stopping by Magpieheaven today. May your week be happy, creative and fun! I'm linking up to Unruly Paper Arts for certain posts this week. They're having an Unruly Paper Arts Christmas Party so if you look at their blog here, you will see other bloggers joining in: do give them a visit too for some special Christmas inspiration!


Tuesday, 25 November 2014

Gift inspired by Lucy at PaperArtsy

Welcome to Magpieheaven, where I'm trying to be well-organized for Christmas this year! I want to make some of my Christmas presents, so when I saw the highly experimental Lucy's idea for marbling with PaperArtsy Frescos and Shaving Foam here, I was so inspired, I decided to adapt it to a gift I had in mind!
 A while back I re-cycled an Amazon folder, giving it a new life as gift-packaging for a book. This time I wanted to use Lucy's technique along with Lynne Perrella stamps to create a stationery wallet. I began by painting my folder with Gesso.
I then wanted to try a little experiment of my own! How would Lucy's marbling work over Grunge Paste?
I used a harlequin stencil and a Prima stencil. I coloured the Grunge Paste so that it would show through the marbling and create a  more colourful effect. I've also added a coat of PaperArtsy Fresco in Irish Cream.
 I used drops of Plum, Autumn Fire, Yellow Submarine, Inky Pool, a blob of Pearl Glaze and Hey Pesto. Sara Nauman text in Snowflake; a decorative corner and a blend of Treasure Gold in White Fire, Green Amber and Aquamarine all contribute.
 You can see the different ways Lucy used to apply the Frescos and Shaving foam here. I used the cling-film and the brayer on my folder and on a piece of Smoothy card.
I haven't used Pearl Glaze very much in the past, but I was very pleased with the effect. After die-cutting this oval, I edged it with gold flakes of Frantage.
Here is the back of my folder. For the front, I used a square of Stampbord and trimmed the edges with die-cut Chatsworth paper. A wooden Prima word completes the cover.
I wonder what the lady on the front of my folder writes and what kind of mail she receives? Does she engage in witty discourse with companions; is she a writer of passionate love letters, or do her epistles give a vivid glimpse of her daily life? I sometimes think that it's sad that the art of letter writing has such a small place in our modern world of texts, emails, Facebook, Instagram and Twitter!
When we open the folder, it's lined with Chatsworth papers, which I painted with a wash of Inky Pool. I've used the motif of pens on the folder, which kept reminding me of the phrase 'The pen is mightier than the sword'. If you look this phrase up you'll find that it can possibly be traced right back to 1621 and Burton's 'Anatomy of Melancholy' in which he says '..it is clear how much more cruel the pen can be than the sword.' Well, let's hope this lady has sent out no cruel missives! As you can see I edged the Stampbord with a touch of White Fire Treasure Gold.
I will be putting a writing-pad on the right hand side, I have slipped some cream envelopes under the flaps.
I stamped the Lynne Perrella pen onto a slip of Chatsworth, adding some faux stitching in white pen. The great thing about this technique is that a large surface like this can be covered with relatively small quantities of paint and glaze.
Thank you so much for stopping by Magpieheaven today. I do hope your Christmas preparations are going well. I am linking up this project to PaperArtsy here  before the month of November ends! Have a great day, wherever you are.